User:Arthgon
Hello guys and gals, my name is Arthgon. I'm 40 and I'm an Ultimate fan of Ultima since I've had Ultima II on my Commodore 64 many many years ago.
The ToDo List:[edit]
C64 Ultima VI:[edit]
- The Journal of the (mis)adventures of Arthgon the Avatar.
- C64/128 version of Ultima VI End game pictures.
Cleanup:[edit]
- I am going to write more projects down in here.
- Any articles that needs to be cleaned? Please do tell me. You point, me clean! :)
Characters[edit]
- Ultima VII
- Ultima VII Part Two A couple still need to be fixed and cleaned.
Dungeons[edit]
Doom
Misc[edit]
- Others that needs to be cleaned.
Walkthroughs[edit]
Ultima VI WalkthroughUltima VII WalkthroughUltima VII Part Two WalkthroughThe Ultima 6 Project Walkthrough
Contributing:[edit]
Armour Data[edit]
- Ultima I
Ultima IIUltima IVWith help from Dungy.Ultima VDungy beat me to it- ROV I and II
- Ultima VI
- Ultima Underworld
Ultima VII- Ultima Underworld II
Ultima VII Part Two- Ultima VIII
Equipment[edit]
- ROV I and II; Better versions and those who are missing.
- Ultima VI
- Ultima Underworld
- Ultima VII
- Ultima Underworld II
- Ultima VII Part Two
- Ultima VIII (if needed)
- Ultima IX (ditto)
Items[edit]
- Ultima V
- ROV I and II; Better versions and missing items.
- Ultima VI
- Ultima Underworld
- Ultima VII
- Ultima Underworld II
- Ultima VII Part Two
- Ultima VIII
Lore[edit]
Ultima V Terrain
Monster Data[edit]
- Ultima I
- Ultima II
Ultima Exodus NESWith the help with Browncoat Jayson. Thanks.- ROV I
- ROV II
- Ultima Underworld
Ultima Underworld IIFinally completely Done!!!
Potions[edit]
Ultima VTribun beat me to it.Ultima VI- Ultima Underworld
Ultima VII- Ultima VII SNES
- Ultima Underworld II
Ultima VII Part TwoUltima VIII- Ultima IX
Walkthroughs[edit]
Ultima I Walkthrough- Ultima II Walkthrough
- Ultima III Walkthrough
- Ultima IV Walkthrough
Ultima V Walkthrough- Ultima VI Walkthrough
The Ultima 6 Project WalkthroughDone!!!- Ultima VII
- Ultima VII Part Two Walkthrough
- Ultima VIII Walkthrough
Fixing (More Details etc):[edit]
Articles[edit]
Ultima VI[edit]
Armour/Equipment/Items/Weapons[edit]
Armour- Equipment
- Items
- Party Members
- Weapons
Monster Data[edit]
- Prominent NPCs
- Quest-related Opponents
Ultima VII[edit]
Armour/Equipment/Items/Weapons[edit]
Armour- Equipment
- Items
Weapons
Monster Data[edit]
Monsters- Highwayman
- Ghost Guard
- Perhaps Ranger?
- Prominent NPCs
- Quest-related Opponents
Portraits[edit]
- Still needs to be done:
AbrahamAdjharAvatar FemaleAvatar MaleArcadionBlack SwordBolluxCourage- Dracothraxus
ElizabethErethianEther GemFerrymanForskisGuard IGuard IIHook- Horance
Hydra BrothersJesse/FemaleLoveTruthXorthian Wisp
Ultima VII Part Two[edit]
Armour/Equipment/Items/Weapons[edit]
Armour- Equipment
- Items
Weapons
Monster Data[edit]
- Monsters
- Prominent NPCs
- Quest-related Opponents
Portraits[edit]
- Still needs to be done:
- Arcadion
Automaton- Chaos Hierophant
- Chaos Serpent
- Columna (old)
Dead: Christopher/Gwenno/Smith The Horse- Draxinar
- Elissa
- Fiend (Shal)
- Fitch
- Great Earth Serpent
- Great Hierophant/Ssithnos
- Isstanar
- King of the White Dragon
- Lady Yelinda (skinned)
- Order Serpent
- Rotoluncia Scroll
Skyrise- Shriash
- Surok
- Tsandar
- Yurel
Merging Articles:[edit]
Anachronistic Armour- Ships
Merging Valorian Steeds into the article Horses
New Articles:[edit]
Living ToupeeStickman
Walkthroughs[edit]
- Runes of Virtue (The Lost Runes)
- Runes of Virtue II
Weapon Data[edit]
- Ultima Underworld
- Ultima Underworld II
Illustrations:[edit]
- Some are not very good looking.
Pictures[edit]
- Maybe Mage Lord's Palace. I am not sure what kind of screenshot is needed.
Scanning:[edit]
Advertisements[edit]
Martian Dreams advertisement Sept 1991Better version of Ultima Underworld advertisement (From the Zero Magazine on July 1992) of mine
Books/cluebooks[edit]
Ultima V Cluebook Black and White Version
Box Scans[edit]
Utima Underworld Series- C64 Ultima VI Box C64/128 of the front and the back
- C64 Ultima Trilogy I (I, II and III) box of the front and the back
Magazines[edit]
- Old Commodore magazines about Ultima games. They're somewhere on the attic at my parents. I hope.
- Other Odds and ends that's needed here.
Whatsoever that does not fit in:[edit]
Finding my old C64/128 on the attic at my parentsand play Ultima VI to see about the bugs that's plaguing the emulator version.
The Journal of the (mis)adventures of Arthgon the Avatar[edit]
Yes. What’s the time? It is Commodore 64 version of Ultima VI adventure time. Journey Onwards!
Starting Location: Earth[edit]
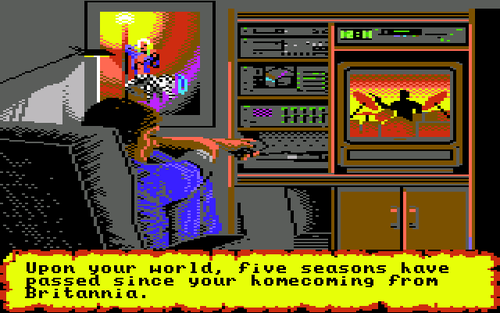
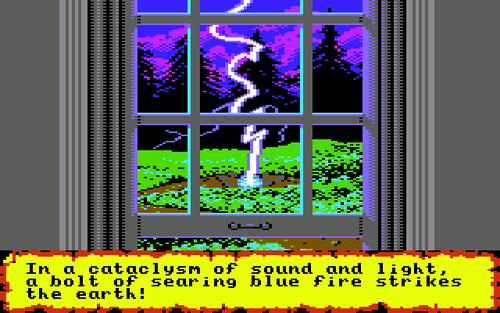
Have you ever had one of those days where things don't go the way you want them to go? Well, it happened to me. I never expected that it would be like this. It all started early 1991 while I was watching one of those forgettable shows, when I noticed a chill wind was rising outside. To my better knowledge (we have all heard about the abridged proverb "curiosity killed the cat"), I still went out to investigate. Looking through the window I saw that in minutes the chilly wind turned into a storm. Then all of a sudden, a bolt of searing blue fire struck the earth!
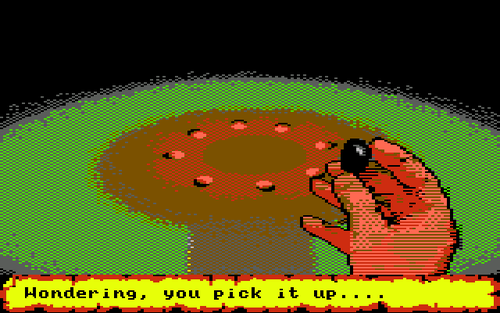
Wait. Could that be a sign (Other than STOP) from distant Britannia? Although five seasons has passed since my homecoming, it felt like ages ago that I heard something from that beautiful land. Despite the fact that it was raining I ran down the path, to the stones, (Leaving the doors once more unlocked. Wow. Must be an Avataric sort of thing, ah?) and among the lingering smell of damp, blasted earth I found a tiny obsidian stone in the midst of the circle.
Wondering, I picked up this curious thing. But as intriguing as the sudden appearance of the object is the immense feeling of a Déjà vu; a strong sensation that THIS event or experience currently being experienced has been experienced in the past. I could not quite remember it yet, but it was on the tip of my tongue.
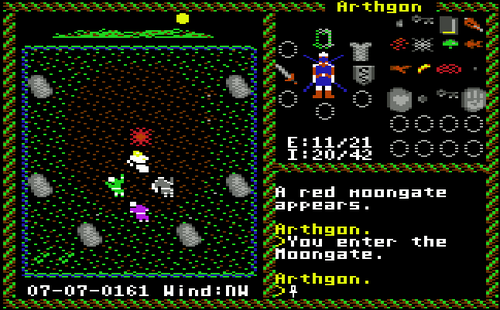
Suddenly a softly glowing door ascended from the heart of the stones! Ah yes, I remember now! Lord British used such a stone to banish the tyrant Blackthorn. But my joy soon gave way to apprehension. Usually the gate to Britannia has always been blue and NOT red. Something must be amiss. Abruptly, the portal quivered and began to sink into the ground. Its crimson light waned. Without thinking I hurled myself through the gate and wondered if my insurance company would even cover this kind of actions. Probably not.
Intermezzo: Companions Died?[edit]
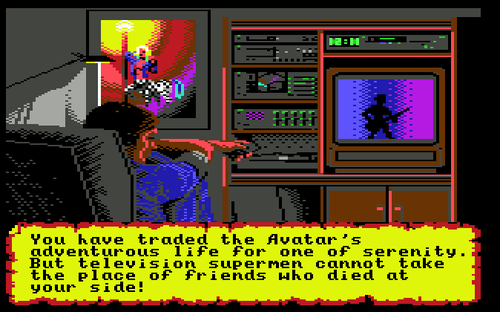
One of the lines in this intro; "But "television supermen cannot take the place of friends who died at you side" gives out the impression that in the original script/intent some of the companions of the Avatar did not survive their mission to free Lord British. They MAY have count in the fact that one character being permanently destroyed by Blackthorn's pendulum when the party were caught in the Palace of Blackthorn WITHOUT the Black Badge and therefore cannot be in the next adventure. Or they kind of ignore the fact that Party Members who were slain in the last battle when they are about to free Lord British in Doom were resurrected by his hands. Both options are possible as well. But still, they all are alive and well now with the exception of Maxwell and Toshi. Therefore, it is more likely that this is a continuity error.
The Gypsy[edit]
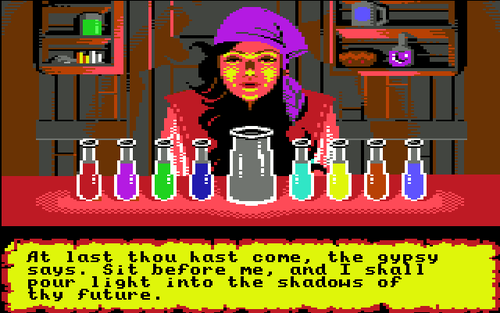
I don't know exactly how it happened, but I seemed to be strolling along until my feet brought me to a curious gypsy wagon. A woman's voice rang out with friendship, beckoning me across the wagon's threshold and, as it happens, into another life. Inside, a familiar looking, gypsy welcomed me with open arms and began to do some casting on the Virtues of the Avatar.
After answering her seven questions, she passed me a flask with a shimmering liquid with a mysterious smile and told me that I, the noble Avatar should drink of these waters and go forth among our people who shall receive me in joy. As I drank the substance a soothing mist obscured the gypsy's face and I sank without any fear in an untroubled sleep.
Intermezzo: Tweaking The Stats[edit]
By answering the questions of the Gypsy each virtue contributes to the stats each time it is chosen:
- Honesty: +3 INT.
- Compassion: +3 DEX.
- Valor: +3 STR.
- Justice: +1 DEX and +1 INT.
- Sacrifice: +1 STR and +1 DEX.
- Honor: +1 STR and +1 INT.
- Spirituality: +1 STR, +1 DEX and +1 INT.
- Humility: Contributes no stats at all.
Using this information, you can guide the answers to get the stats that your character want. To get a specific combination of virtues you MAY have to re-install a couple of times until you have the right one.
The Sacrificial Slab[edit]
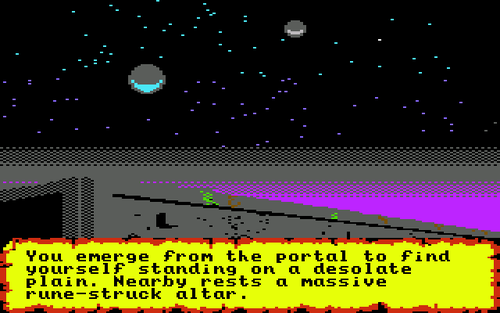
Oh man! I've a feeling we're not in Kansas....huh...wait...never mind. The question is where am I exactly? But then again, do I even want to know? Examining my surroundings, I realized that I was on a desolate plain with a massive rune-struck altar nearby. Wait. What was that? Somewhere on these desolate plains I heard a hundred voices chanting. By the time that I finally figured out where it came from, the chanting already draw closer and closer.
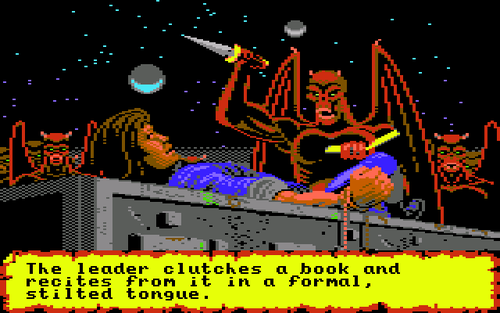
Out of nowhere, fiendish red creatures appeared, grabbed me with unearthly strength, and bound me to the altar stone. The hordes sway and chant as a winged nightmare stepped forward. Not only must this guy be THE leader of the pack, *vroom vroom* but he also clutched a book that looked very interesting to me. He opened the book and began to recite from it in a formal, stilted tongue. Shouts exploded from the masses as he slammed the book shut, and started to threaten me with a nasty looking dagger. As my whole life flashes before me like those series called "This is your life", a yellow-fletched rose bloomed in the priest's forehead. Bulls-eye!
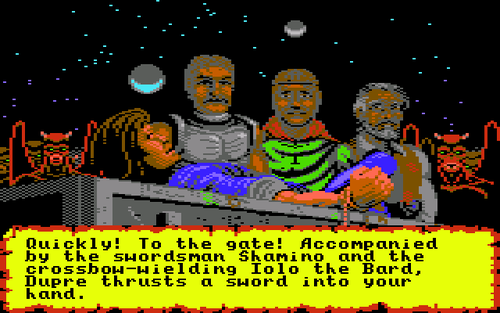
Phew. Luckily that my old companions were not too occupied to save me from their clutches! Otherwise, it would have been a very short adventure. In a hurry we dived through the red moongate to safety, not before Iolo snatched the book from the priest's corpse. Let's get out of here.
The Arrival At Lord British's Castle[edit]
Great. Just great. Not that it is an out of the frying pan and into the fire situation, but after escaping a sacrifice of which I was the intended victim (Must remember that I definitely should complain to the travel agency about the dangers of the moongates), I still would not mind that two of the same creatures (you know...those who tried to sacrifice me), did NOT follow us through the portal into Lord British’s Castle and attack us.
Fortunately, (Or not. It depends on how you look at it. These creatures are not THAT happy with the outcome. Well, being dead and such) the battle was over in no time.
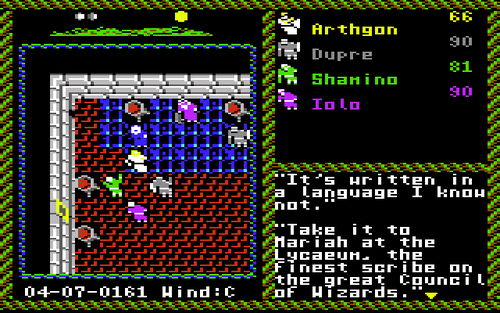
Still dazed I first spoke with a concerned looking mage. Nystul the royal magician explained to me that it was him who first learned of my peril through the mystic arts, so that aid could be sent to me. Thanks. He also was intrigued by the book that was taken from the Gargoyle priest and asked Iolo to let him examine it. On its cover was a picture of a gargoyle standing with one foot on the chest of a slain human. One problem, (how very surprising) he could not read the language at all. That is why I had to travel to the Lycaeum to meet the wizard (not Oz) with the name of Mariah. (and no...is not Carey either) An old friend of mine. Unlike this guy here, she HAS the capability to translate an important plot-driven object. Seeing the Orb in my inventory, he told me that Lord British knew more about it.
Lord British told me that the shrines of virtues are in the hands (uh, claws) of the Gargoyles (so that was the name of those creatures) and need to be re-captured. He also taught me how the Orb of the Moons works. Luckily, I am a fast learner. To get more information about the dire situation, I have to talk to Geoffrey.
The Captain of The Royal Guard and an old friend of mine Geoffrey told me that the leader of the survivors of the counter-attack against the Gargoyles at the Shrine of Compassion can help me. I have to look for him in Cove.
Instead of travelling directly towards Cove, there are some things that needs to be done in the castle first. What would that be you may ask. Taking everything important that is not nailed down with me is the answer. I left the throne room by the south door and immediately took the door to the left. The door to the north is Lord British's bedroom. The south door leads to my room. Lord British's bedroom, here I come!
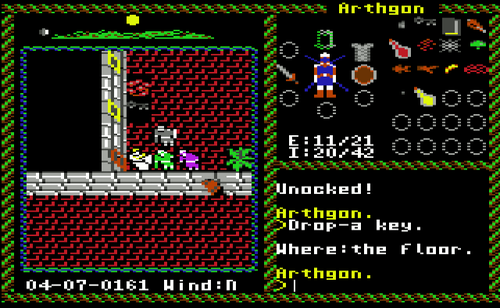
The bedroom of Lord British was very fancy and just as comfortable. Yes, you could say that it was fit for a king. On the left I could see two doors. One of them was locked. Well...let us put the emphasis on WAS, because after I took the key from the floor that is no more the case......and what is behind the unocked (and yes, it is really spelled that way) door number 1? The answer is; a private observatory! The door number two led to a room where I found some weapons, potions and armour.
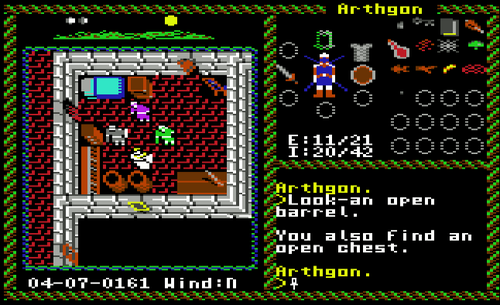
I left Mr. Nose's room and went to the south. THAT is MY room. Here, I found my spellbook, reagents that are needed to cast spells and some other stuff that is important.
Now that there is nothing else to pilfer in my room, I left and went further to the left that leads me to the lab. A couple of potions that are essential to survive in Britannia could be found here. While putting them away in my inventory I noticed that I was not alone in this place. Someone else was roaming around here as well. Surprisingly, it was a talking mouse. She told me that her name was Sherry and that she wants some cheese...pronto. I had nothing on me, so I went to the kitchen and came back to give her what she want. I had the feeling that she was important in my party, but not at the moment. We said goodbye and I left.
Leaving Britain behind, I journeyed to Cove to speak with the leader of the pack that got beaten by the Gargoyles.
Intermezzo: The Scavenger Hunt[edit]
As an option you could follow the string of notes that Chuckles, THE royal jester of Lord British's court has scattered throughout the kingdom. IF you have done it right, you will end up with Smith, the talking horse. He will give you a vital clue that is centuries too late...if he can remember it.
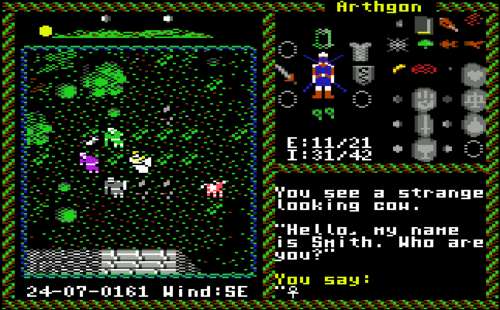
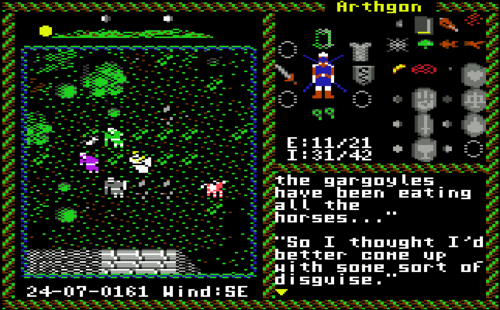
Wait...wait...a talking horse? But...but...that is a cow. Yes, originally he is. However, in the C64 version he is a strange looking cow now. The exact reason?
Well, he was so afraid that the Gargoyles will eat him like all the horses, that he donned a disguise to prevent that this would happen. First, he tried on a cow suit, but he quickly came to his senses and realized that this was too ridiculous. Then he had a "better" idea and asked Nicodemus to turn him into a REAL one.(In reality all the horses were completely removed by the programmers, because of the limitations of the C64. To explain their absence they all were now eaten by the gargoyles.)
Cove[edit]
This is a small retreat, dedicated to the arts of healing. There at the Traveler’s Shrine, I met the mayor of Cove, Viscount Ahrmand.
He immediately told me that a protection field similar to the force that once blocked entry to the shrines shielded the nearby shrine. According to him, the corresponding Rune and Mantra could destroy it. That means I have to do the same thing with other shrines. To accomplish that I had to speak with Tholden in Britain. He also advised me to speak with Gertan who was in the healing hands of Sasha for more information. Let us say goodbye...and so I left the mayor to his musings to find the leader of the disastrous counter-attack against the Gargoyles.
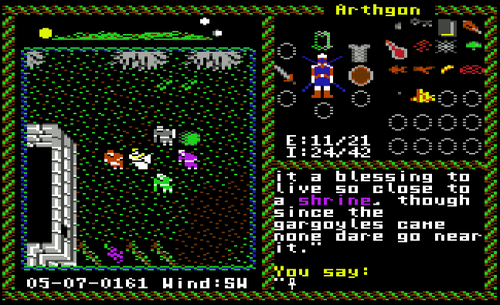
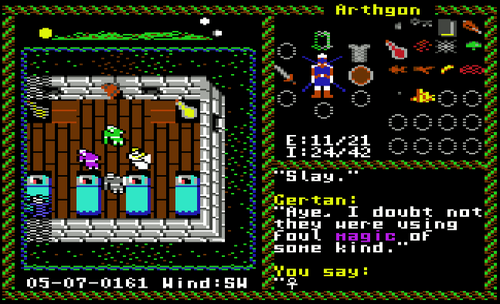
The healer, nurse Betty...I mean...Sasha was not THAT friendly. She told me that I had to leave them alone so that they could heal. But I could not. I had to know more about this situation. So I spoke with Gertran who was jovial and friendly. Luckily, for us (or else we could not have spoken with him in the first place) that guy was healthier than his own men were. He confirmed the bit of information that Ahrmand gave to us. There IS a protection field who shielded the shrine against intruders.
Let us do it. First, some serious shopping, then I could return to Britain to get the Rune and learn the Mantra of Compassion.
Intermezzo: INCREDIBLY Important[edit]
As you can see I will follow the plot in the most logical way. You should go FIRST to Cove and THEN go back to Britain to get the Rune and Mantra. And THEN go back to Cove to USE the Rune and Mantra of Compassion at the Shrine! Why? That is because in Cove you actually learn that you have to use the Runes AND the Mantras to free the Shrines from the "evil" influence of the Gargoyles from Viscount Ahrmand. Strange ah? Oh...well...stranger things may happen, right? Right.
Britain: Rune of Compassion[edit]
Back in Britain, I spoke with Tholden. He told me the identity of the current owner of the Rune of Compassion. The Bards of the Conservatory seems to have him/her/it, and knows the mantra as well.
At the Conservatory, I met a nervous bard named Lady Nan (what is in a name?) the wife of renowned Britannian musician Kenneth. This woman told me that she gave the Rune to Ariana. Oh. Not only that, she also told me the Mantra; it’s MU. All right. Let us go and talk to the kid then.
This girl asked my name and gave it to her. Feeling acquainted, we talked freely about her job. I went on to ask about the Rune of Compassion. She told me that I had to ask permission from her parents.
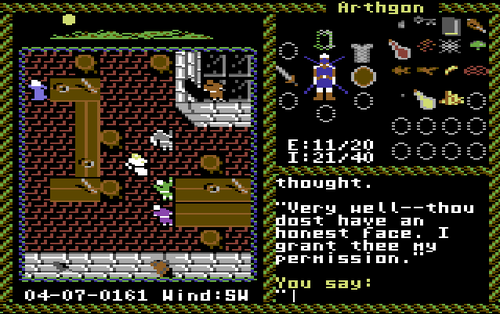
Their tavern called "The Blue Boar" was not hard to find, just past Iolo's Bows. It was a nice and cozy place with great atmosphere and the prices were not too high. Anya, Ariana’s mother was friendly but professionally minded. Did you know that all the income of this tavern go to Ariana’s study at the conservatory? Yes, really. After I received permission from Anya, I went back to Ariana for the Rune of Compassion.
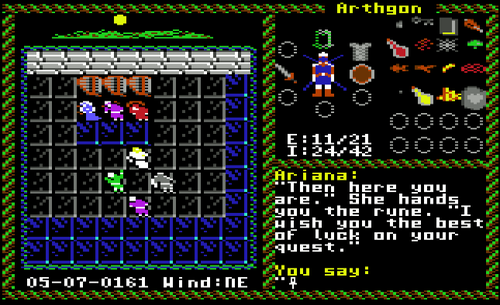
Without any hesitation, she gave me the Rune so that I now could travel to my next destination: The Shrine of Compassion.
Intermezzo: Who are you Who who who who?[edit]
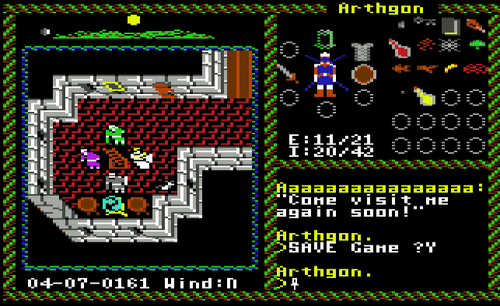
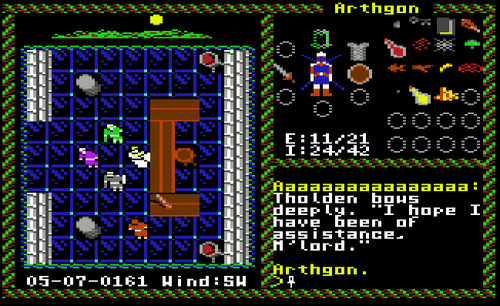
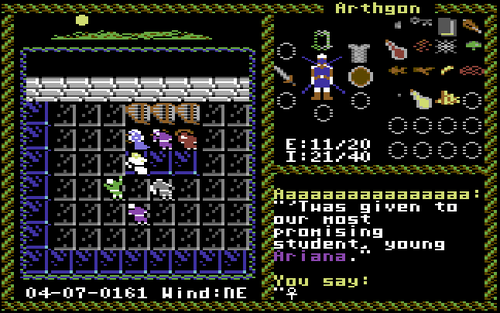
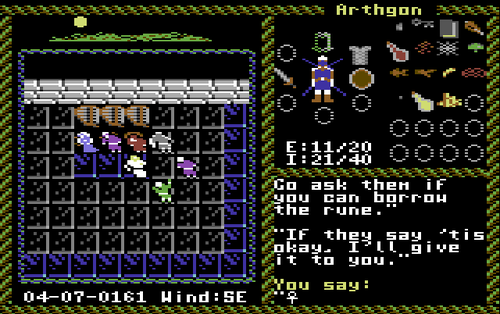
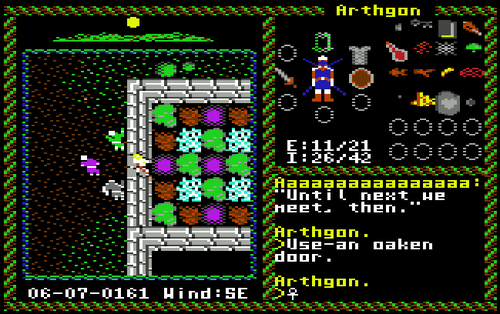
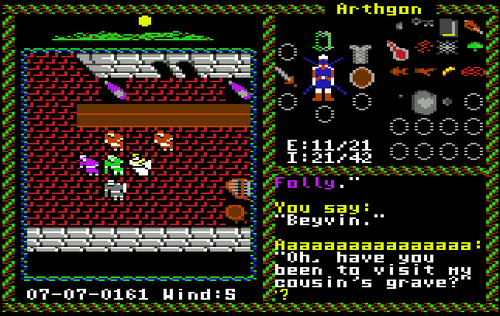
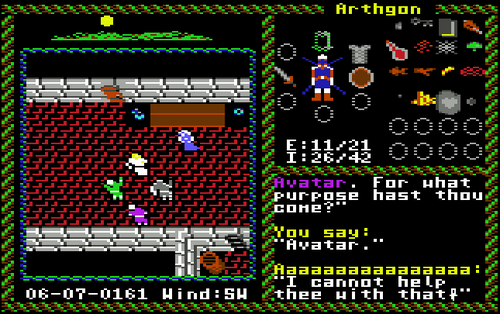
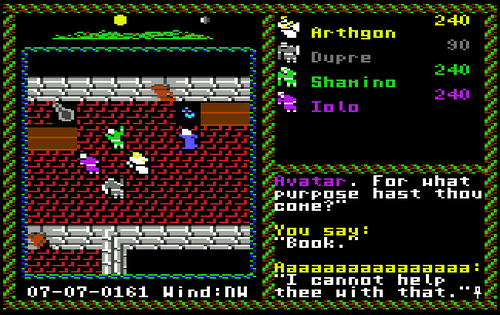
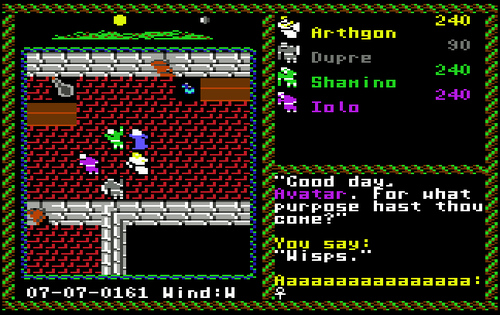
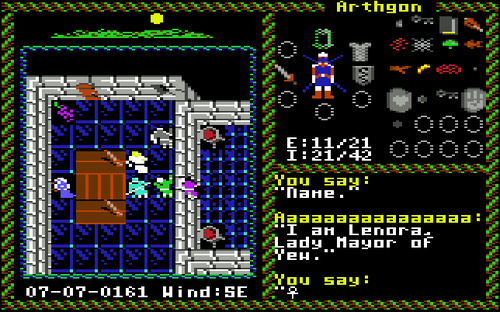
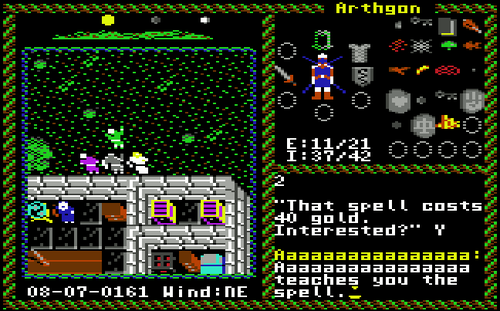
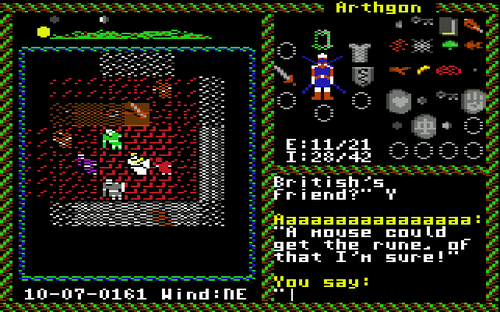
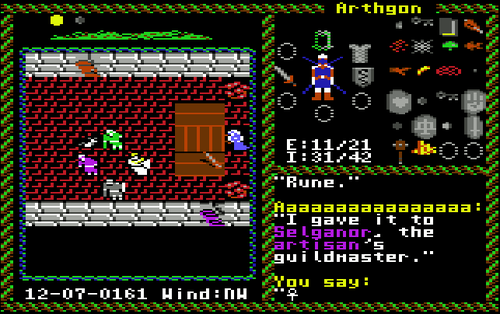
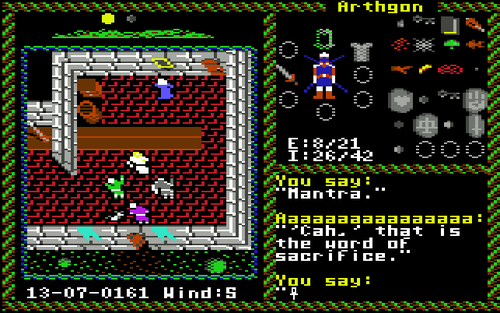
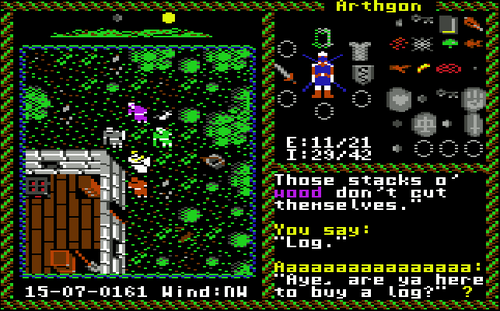
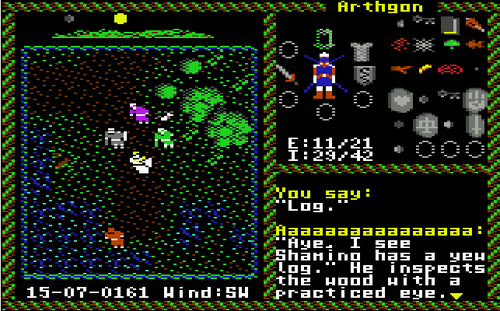
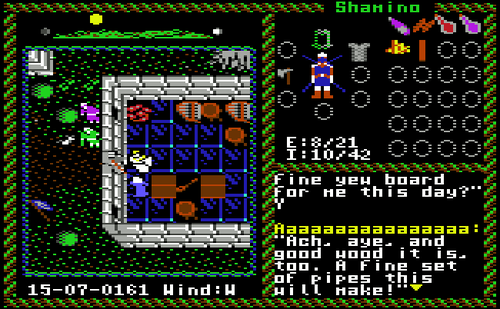
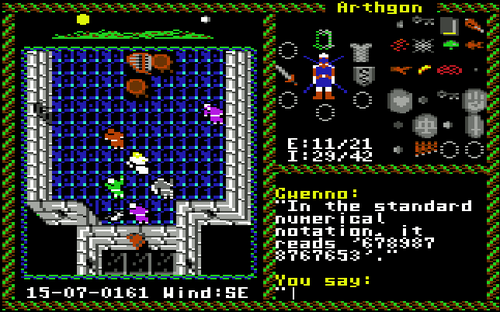
Somehow, they all rather call themselves "Aaaaaaaaaaaaaaaa" than their actual names. Come on! Follow the script! Oh, wait...it is a bug. The odd thing is that THIS does NOT happen all the time when I spoke to Xiao and some others.
Shrine of Compassion[edit]
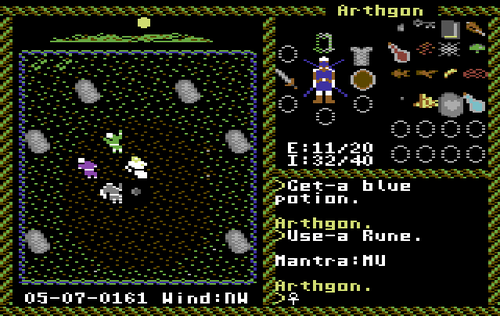
Here, my companions and I came across a welcoming committee of gargoyles. Ah, I already have some fans. They welcomed me with readied weapons. With perseverance and hardship, we won the battle. While I was looking around for loot, I soon noticed that the one with the wings dropped a potion. A blue one. It was okay to pick it up, because we all know that the gargoyle was dead, so he would not need that anymore.
Just as I picked up the potion, I heard the humming of the force field. Let us free it from the influence of the gargoyles. Humbly *ahem*, I knelt down before the shrine, took out the Rune and used it. A mystical voice in my head came to me and asked for the Mantra of Compassion. “MU”, I said.
Before I knew it, the force field was utterly gone! With the force field gone, I could see that a moonstone was lying on top of the shrine. I stood up and took it with me. Not only the meditating at the shrine, got our dexterity up, it also told me that "No beast so fierce but shows some touch of pity." "Sweet mercy is nobility's true badge." Now that I am of a higher level than three, I could buy "Great Heal" as well.
Intermezzo: Gargoyles Bug[edit]
I am not sure if this supposes to happen, but as you move far away from the shrine and come back to the shrine, the gargoyles are back! It is good for experience though.
Next Stop: Moonglow: Honest![edit]
In the city of Honesty (Using the Moongate Express), I spoke with Lord Aganar of Moonglow. He told me that he entrusted the Rune of Honesty to Beyvin's care. BUT, he did not had any clue about the whereabouts of this guy. Really? Great job Aganar. To know the exact location of him, I had to visit his girlfriend Penumbra.
As I open the door of Penumbra's home, I soon stumbled upon some magical fields. I quickly came to the conclusion that I need a spell that could counter them, nice and easy. Near the Lycaeum, I found someone who could give it to me. Her name was Xiao. After talking to her, I got (well...sort off) the two right spells that was essential for my questing.
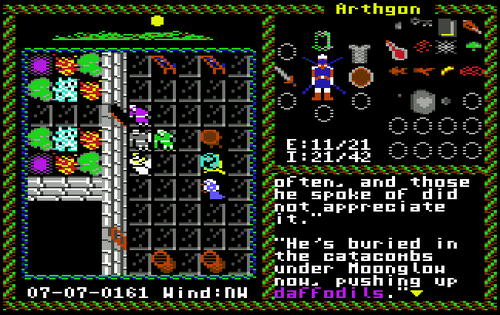
After handling the magical fields with the spell Dispel Field (talking about being a wee bit paranoid), Penumbra told me the future and where I can find Beyvin pushing up some daffodils. Why? Seems he had an allergic reaction to a short piece of steel that somehow found its way between his ribs. According to his girlfriend he is buried in the catacombs under Moonglow with the Rune. She also knows the Mantra of Honesty for a fee; AHM.
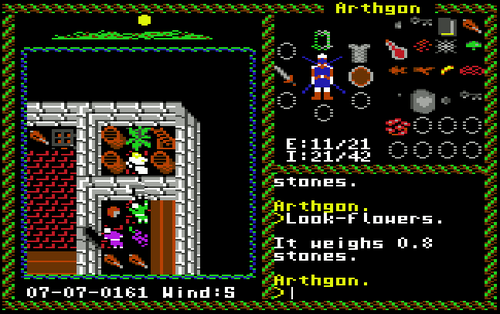
Manrel, the cousin of the deceased asked me some questions before handing over the key of the crypt and some flowers that I need to place upon his grave.
Behind a locked door in the Blue Bottle Tavern, I found the way to the Moonglow Catacombs. With a deep breath, I went down the ladder and wondered if the insurance was also included for dangers that lay ahead in such places.
Intermezzo: The Trouble with Xiao[edit]
Spell Trouble: Whose Line Is It Anyway?[edit]
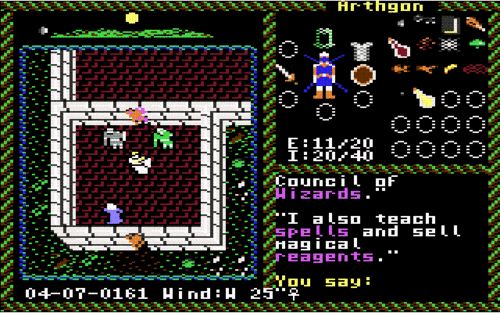
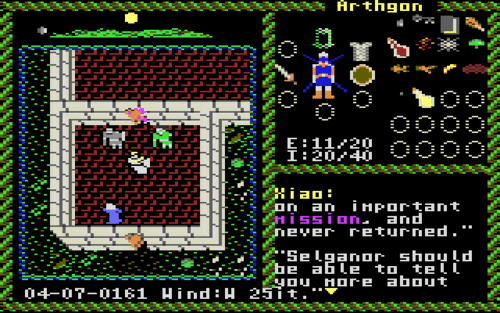
As you can see from the picture above, she follows the right lines of the script. However...this happened.
IF you want to buy Spells (or use the keyword Learn) ...she begins to use lines of Isabella from Minoc. Is it just me or is she suffering from an abrupt identity crisis or having multi-personalities? “Curiouser and curiouser!” (Interesting enough, the same thing happens when you are using the keyword Mantra) Alas, the game gets stuck afterwards as well. Meaning that you cannot buy spells and have to re-start and load the previous save.
Therefore, thanks to a bug called Xiao. Wait. That did not came out right. Sorry girl. Let me rephrase that. Thanks to the bug with the keyword Spells you have to get these TWO important spells; Telekinesis and Dispel Field, in a dishonest way. (Ironic is not it? As being dishonest in THE City of Honesty) Mind you, this is from the emulator. However it IS possible to get the fixed version of the populace disks here. Just download "Htw-fixed". Thanks to Tribun.
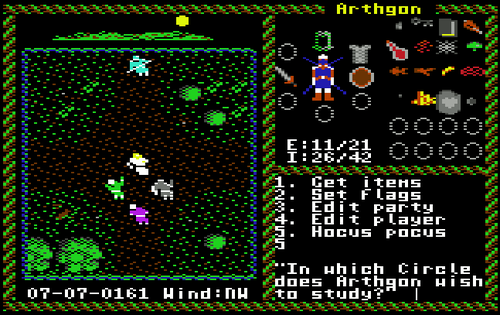
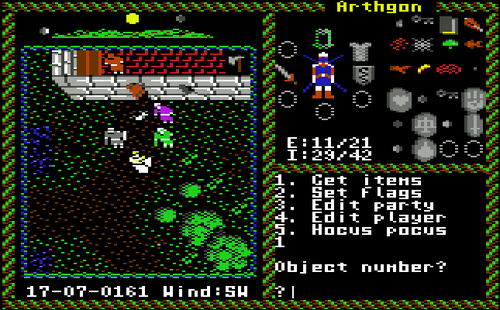
To get them you have to use The Cheat Menu. First, you have to talk to yourself and say the following.
I (enter)
want to (enter)
cheat (enter)
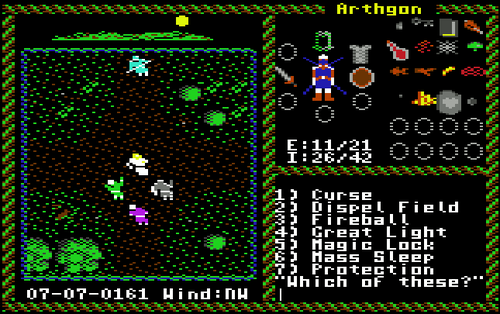
When that is done, press 5; Hocus Pocus. This allows you to learn ANY spell in the game. The first thing that you will have to do is to point out in which circle you want to study.
(In this case; the 3rd Circle. Thus, press 3.)
At this point, you can now choose the spell from the list of that Circle. (In this case; Dispel Field. Therefore, press 2.)
Spell Trouble: Reagents[edit]
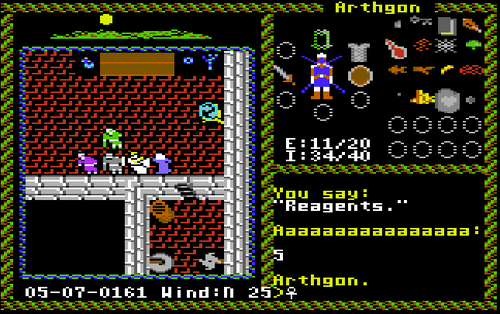
In case of the keyword Reagents (or Buy) the conversation with Xiao will NOT cause the game to get stuck, but the conversation is just over. That means you cannot buy any Reagents from her.
Spell Trouble: Bugged Keywords[edit]
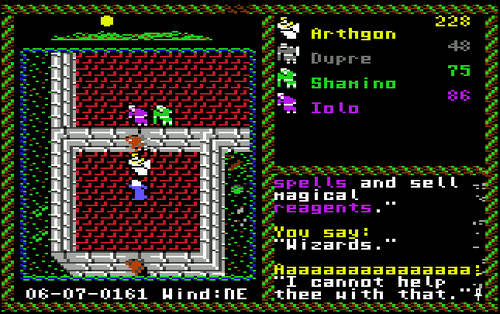
Unfortunately, these are not the only bugs that can be found in the game. Other highlighted keywords of the conversation are also sadly bugged.
As you can see above, these two keywords; Avatar and Wizards (just like the keywords Powe, Serv, Shri, Libr, Coun, Prom, Virt and Thar) will also cause an error message to appear and/or she will say that she does not know anything about it. Unfortunately, the game gets stuck afterwards and you'll need to re-start the game.
Important: It is also NOT advised to use any other words either (like the one above), because that will get the game stuck as well.
Spell Trouble: Missing?[edit]
Just like some of the spells the C64 version of Ultima VI also miss the spellbook or a Yew staff in the inventory lists of the Ultima VI Magic Shops.
IMPORTANT: Eighth Circle Spells[edit]
Let me just throw it out; Because of the keywords bug that is inflicted upon Spells and/or Learn you'll NEVER hear from Xiao that you'll need to seek out the Wisps, before the spells from the 8th Circle can be learned. However, the bug stands in the way to get those spells anyway.
Not only that, the keyword Wisps (just as the keywords; Powerful and Secret) is bugged as well and may cause the game to get stuck afterwards and you'll need to re-start the game.
Moonglow Catacombs[edit]
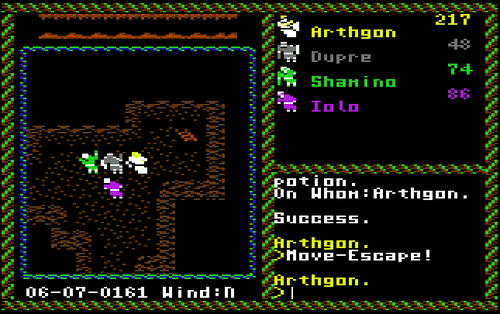
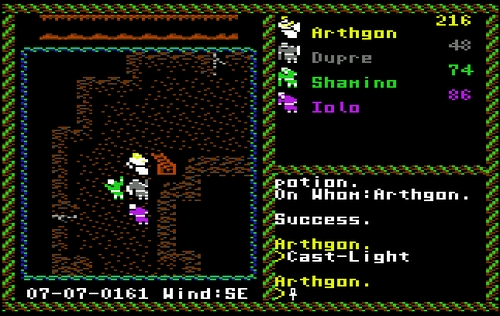
I was now in one of the famous landmarks of Moonglow; The Crypts. According to the local tourism, this landmark was just as old as Moonglow and has always been used as THE burial place for the citizens of this fine city. It was also 'VERY dark in here.
Iolo: "Oh no! Without a good light source we probably get caught by a Grue, so...
Shamino: "A what?"
Me: *facepalm* A Grue? Seriously Iolo seriously? What's next? A white house, with a boarded front door, a small mailbox or even an Echo Room? Wow. And I thought that Dupre was the only drunk here."
Dupre: "DRUNK! Come on! One time! Only ONE time I drank too much!"
Shamino: *smirk* "A lot of times."
Dupre: "I must have lost the count..."
Iolo: "Losing the count of drinks does not count!"
Dupre: "Yes, it does!"
Iolo: "No, it's not!"
Dupre: "Yes, it does!"
Iolo: "No, it's not!"
Now, if you'll excuse me I first have to slam my two companions' heads together. *Slam* With that out of the way, I cast Light to brighten up the day and everything around me.
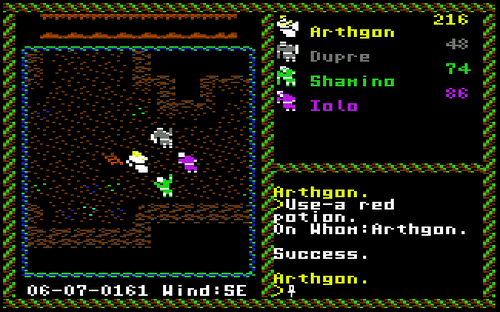
Feeling adventurous I travelled to the north, west, passing an interesting ladder, through some marshes (Red potions is really handy here), south, east and down the ladder to the next level. Yes, I could have just go to the west, but I did not. That would have made things waaaaaaay too boring.
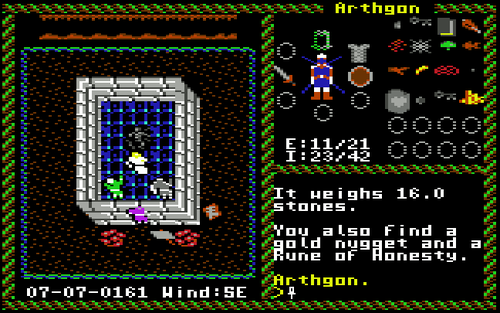
On the second level some Slimes and Acid Slugs await in the darkness. After defeating them, the final resting place of Beyvin stood finally before me. As promised to Manrel I lied down the flowers as a token of respect. Yes, promised is promised. Then I unlocked the door with Manrel's key and went inside to investigate. Inside the crypt I searched the decayed body of Beyvin to find the Rune of Honesty that was buried with him. Beneath the pile of bones I came in the possession of the important symbolic artifact and also a gold nugget!
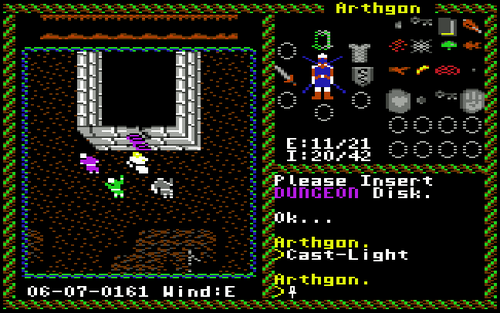
Because I am not yet in the possession of the Unlock Magic spell, I cannot unlock these magically locked doors here at the moment. Using the ladder on the right of the tombs I descent to the third level.
To my disgust, I discover that this door is just as magically locked as those that I found on the previous level. I have to deal with this later. In the meantime I just go back to the Blue Bottle Tavern.
Intermezzo: Another Entrance to the Moonglow Catacombs[edit]
There is another entrance to this place that I actually find very interesting. Have you seen the other UP ladder on the first level?
THIS one. Now what lies beyond the ladder do you think? Could there be any possibility that it leads back into someone's house?
Exactly! The ladder brings you into the house of Xiao! The question remains; What's the main reason that she has access to those crypts? Has this woman some unsavory methods that we do not know of with the dead? Alas, we will never know for sure. But then again, she IS a wizard. Strange people those wizards.
Shrine of Honesty[edit]
While I could have taken a ship (or a skiff) to get there, I just used the Moongate Express to have a more dramatic approach. Besides, it would have taken toooooo long if I find one that actual floats. That is because 1) nobody on this island, were professional shipwrights and therefore could not sell me a ship. 2) the island was just too big to set off and search for a skiff that may be lying around somewhere. 3) Alright, I was a bit lazy, okay? Sheez.
Strangely enough, nobody was encountered for at this shrine. No Gargoyles who were bound to take my life...and my companions. Nobody. They must be on a tea break or something. To liberate the Shrine of Honesty, I used the Rune and said the Mantra of Honesty; “AHM”. Success! With the force field gone I could now take the Moonstone that was lying around on the top of the Shrine.
Now feeling virtuous I knelt down and meditate to gain deeper intellect and greater magical power. I heard another mystical voice in my head who told me told now that "Whatsoever things are true..." "Whatsoever things are honest..." "If there be any virtue and if there be any praise, think on these things." Afterwards, I used the Orb of the Moons to get me to the city of Justice.
Intermezzo: Encounter?[edit]
It was said that the only shrine you would not encounter Gargoyles is the Shrine of Spirituality, but NO ONE was to be found at the Shrine of Honesty as well. A bug?
Yew:...And Justice for All[edit]
Yew. Ah, yes, I remember this place. It feels ages ago since I visited the city of Justice. Back then, Yew had become one of the bastions of Lord Blackthorn's regime, where members of the citizenry lived in constant fear of the draconian rule of law AND the visiting Shadowlords. These spectral embodiments of the antitheses of Britannia's three cardinal Principles (Flames of Truth, Love, and Courage) were not here for a friendly visit that includes tea, friendly chat and some biscuits. Only to warping the minds of those within with hatred, falsehood or cowardice. So, it is good to see that after the return of Lord British the whole city within the Deep Forest...
Iolo: "Yeah, you literally can't see the forest FOR the trees, right? right?"
Shamino: "...."
Dupre: "...."
Iolo: "Okay, okay. Wow, tough crowd."
Wow. Everybody thinks they are a comedian now, ah. *sigh* Now, where was I? Ah...yes...of northwestern Britannia had largely recovered from the harsh totalitarian regime and becoming again a woodland hamlet where woodcraft and simple industry flourished. The trademark of this fine city is THE primary seat of Justice within the realm of Britannia; the High Court. And that is where I am heading to. Why? Because I am pretty sure that someone there could tell me the Mantra and current location of the Rune of Justice.
You know, the last time I was here, during the dark era of Lord Blackthorn's regency, this post was occupied by one of the leaders of an organisation called the Oppression, the judge and head inquisitor Judge Dryden. His main job was to fulfill Blackthorn's cruel justice. However, when the dark regime fell, this man lost his job and the post changed hands to someone else. The current Lord Mayor is an unfriendly, suspicious and stern woman called Lenora.
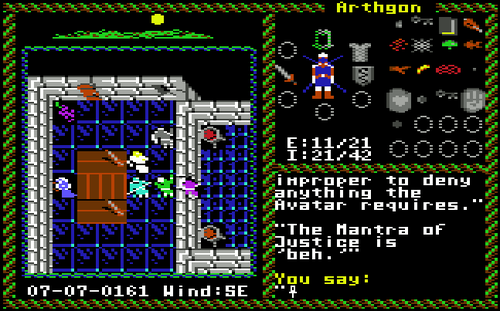
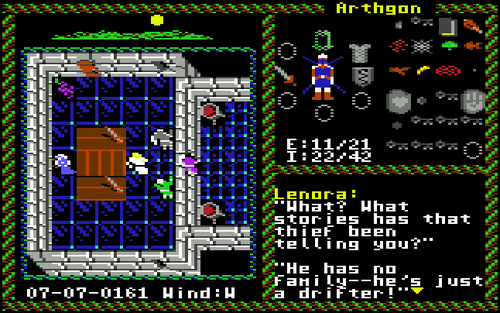
After asking about the Mantra of Justice, Lenora told me that she could not believe her ears that I may not know this, but thought it was improper to withhold this information. So, she gave it to me. Good.
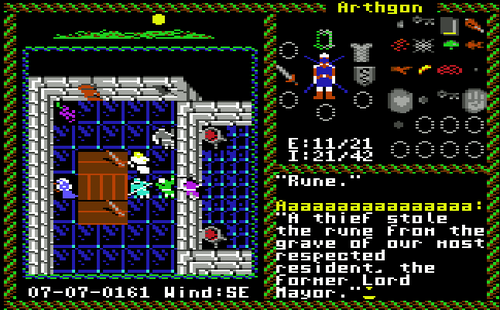
Lenora also told me that the Rune of Justice has been stolen from the grave of a former Lord Mayor. Good news; the thief has been caught and spending time in jail. The bad news; the important quest item was nowhere to be found. Figures. That is how it goes for all Avatars. Let's have a little chat with the one who stole this.
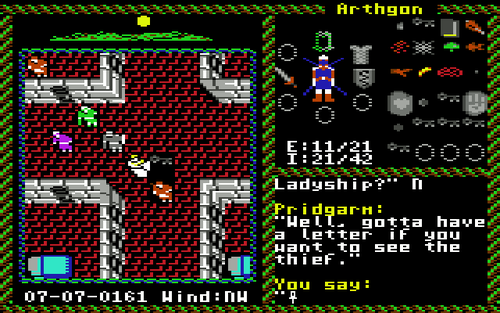
The jail was managed by an old man whose pastime was whittling. He told me that his name was Pridgarm. I told him that I want to do a tour and he gave me his keys. Unfortunately, the keys only open the main cells. So, I talked to him again.
He told me now that if I want to visit the solitary prisoner I need a letter of permission by Lenora first. Alright, let's get it then.
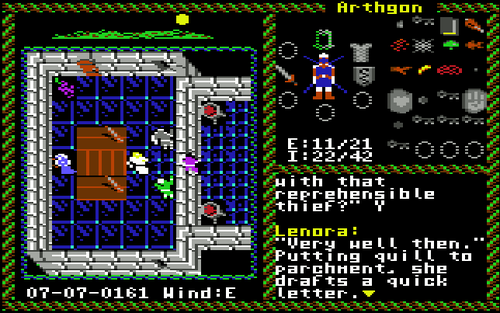
Without hesitation she gave me the letter of permission when I asked for it. (Otherwise I would have complained at the UA. That is THE Union of Avatars.)
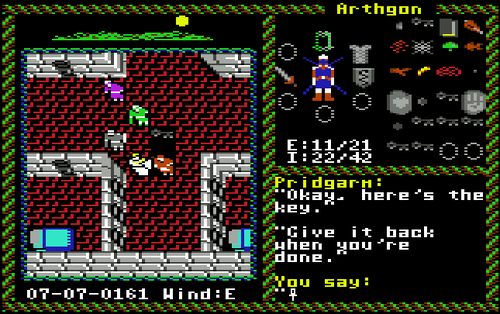
With the permission letter in my possession I can now have the key of the cell of the thief who stole the Rune of Justice. I wonder what this guy has to say about the situation that he is in. Not to mention, where he has hidden the important quest item.
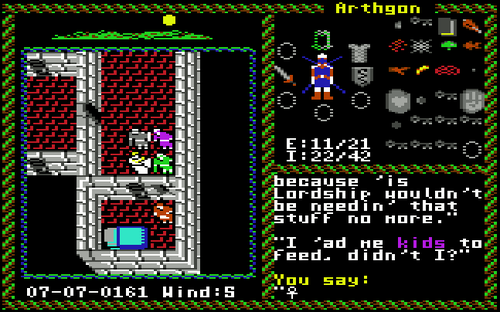
The thief told me that his name was Boskin and claimed that he only stole the Rune, because he needed to feed his poor kids. Suuuuuure. I don't trust this kid any further than I can throw him. (well...I can throw pretty far, but still) Lenora is the right person to check this "story". So I went back to talk to her. (yeah. That is how it goes to us poor Avatars.)
Aha! Just as I have thought he was indeed lying. The truth is that he is nothing but a drifter without any family.
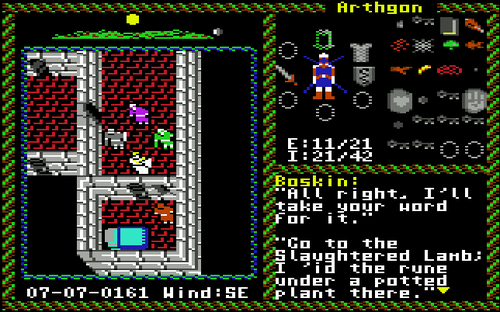
Confronting Boskin with this new and condemning evidence, the thief immediately came clean and told me that it all was just a ruse (it did not work though) to get sympathy from Lenora. Known that the jig is up Boskin confessed without hesitation the hiding place of the stolen good in exchange of being released from prison. The Rune was hidden under a potted plant in the Slaughtered Lamb.
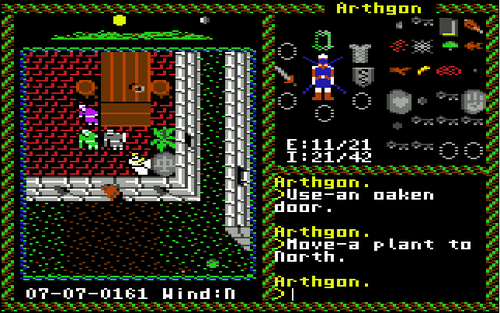
Now I know where to look for the missing Rune, we visited the Slaughtered Lamb to collect it. And there it was, under the potted plant next to the door. Just as Boskin has told me. I took the important quest item, and then went back to the prison to return all those keys. I really do not need them anymore.
Before we go to the Shrine of Justice, we ought to do two things. First we take a visit to the local armorer. Someone told me that while he does not have any particularly good armor, he DO sell Swamp Boots. If you do not want to get sick from swamp-borne poisons, you need one of those.
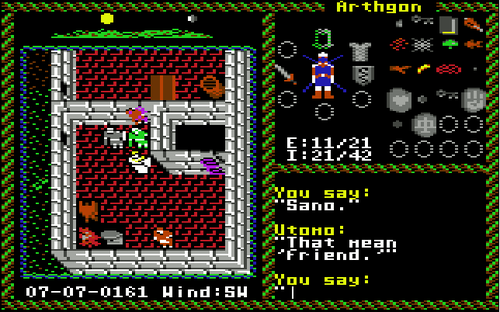
Entering the shop a huge, dark-skined (is it even supposed to be spelled like THAT?) man with a close-set face welcomed me with "Ombogo sano!". According to Utomo (yes, I asked his name) it means "Hello friend". (NO Iolo, NOT hello sailor!) He also told me that his name meant "Island" and that he came from an island (yes, that IS very deep, ah). Years ago, he ran away from the island when he was threatened by an evil man. In these days he is making weapons/armor in this land.
Alas, his selection of armors only existed out some leather armour. Blast! This remarkable piece of armour probably only exists in another dimension of this world or something. Well...this is disappointing.
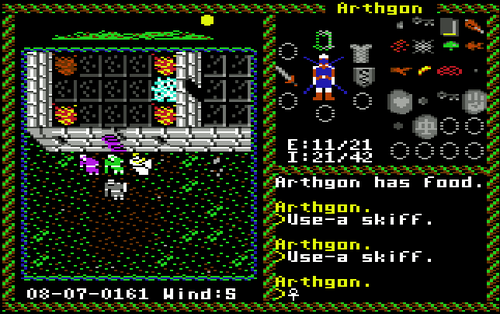
Nicodemus is the next stop. Why? He is one of the two wizards who sells the Unlock Magic Spell. How to get there? The best thing to do is to go east from Yew. Then at the end of the road there will be a pier with two skiffs. Taking the lower one and by sailing south we eventually came to Nicodemus house.
Because of his private nature, he set up some clever defenses as force fields and a magically locked door to keep his privacy. The force fields is not the problem. The magic lock IS the problem. To get past the magically locked door you need an Unlock Magic spell. Nicodemus sells the Unlock Magic spell. He may be crazy, but still very very sharp.
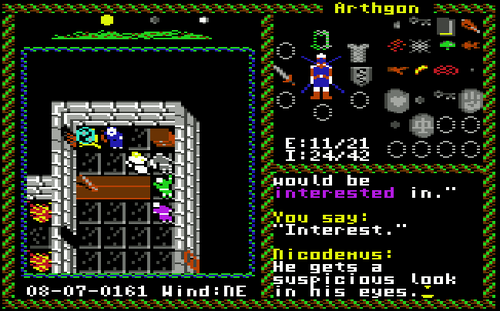
I soon discover that I needed to use a white potion to get a clear view of the wizard, because there is no windows near him. He comfortably sit near the crystal ball in the upper side of the house. The walls became look-through when I gulped the potion. With the money that I have in my possession I bought the crucial spell from Nicodemus. After casting the spell on the magically locked door I removed the protection field that was blocking the door. The rest of the money I used to get the spell Protection and some reagents; Blood Moss, Spider Silk and Sulfurous Ash.
He also seem to be experimenting with something, but he quickly told me to stop being so nosy when I tried to get more information out of him. Everything that was needed in Yew is done, so I can row back to the pier and go en route to the Shrine of Justice.
Shrine of Justice[edit]
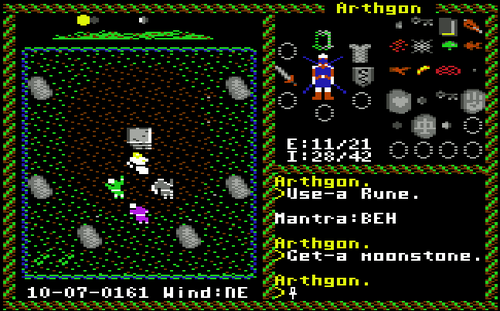
Even before I knew it, I was already there. (wow, that went really fast!) And of course there was a welcome committee there again. Greeting me with boomerangs and murderous content. The battle was hard, but we won. Victoriously I used the Rune and spoke the Mantra; “BEH” to remove the Shrine's force field without being attacked. Having the Moonstone in my pocket, I knelt before the Shrine and the mysterious voice told me that "Justice without force is impotent." "Force without justice is tyranny." Through the meditation we all had an increase in Intelligence and Dexterity. And of we go to Jhelom with another try with a moongate.
Intermezzo: NO Bodies Behind?[edit]
As you may have noticed by now, there IS another quite change in the C64 version. Unlike the PC version there no dead bodies left behind when you have defeated your opponents.
Jhelom: No Dutch Valor here![edit]
This city who lies on the Valorian Isles in the southwest seas of Britannia has dedicated itself since the beginning of the Age of Enlightenment to the virtue of Valor. Interestingly, it still fell victim to the Shadowlords. To get more information about the Mantra and Rune I had to talk to the mayor of this place.
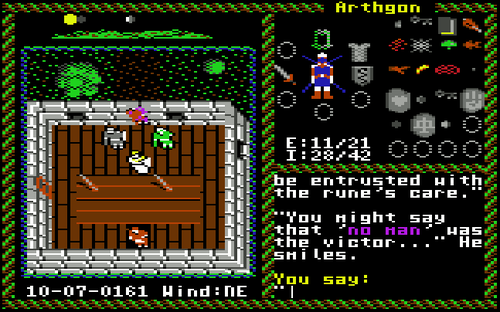
The mayor whose name was Zellivan told me something interesting about the Rune of Valor. There was a tournament here in the Sword and Keg Pub to decide who would be entrusted with the rune's care. Who has won? THAT was "no man". Better go and see him.
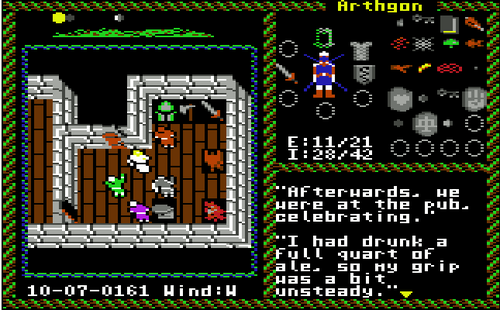
I soon found Nomaan ("no man") a blond man with broad shoulders and a stern, unsmiling face in his shop called Naughty Nomaan's. In here he confided me with some useful information about the Rune. Yes, it was true that he indeed won the Rune, but lost it again as he clumsily dropped it while being drunk from a couple of full quart of ale.
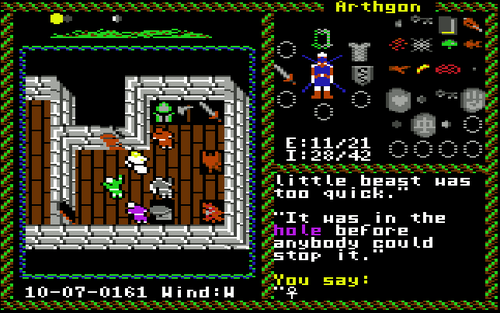
A rat (hence, another interpretation of "no man") took the opportunity and ran of with the quest item into a mouse hole in the west wall of the pub. They have tried EVERYTHING to get it, but to no avail.
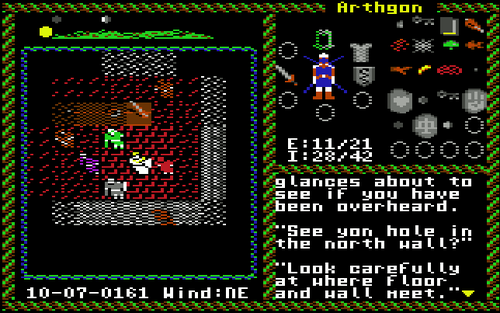
It was getting dark but I could still make out that The Sword and Keg was just like any other taverns in Britannia; random brawls, good beds, drinks and eatable meals. Except boasting about swordsmanship and fanciful accounts of their exploits was pretty much common here. A girl of perhaps twelve years old with the name of Lyssandra (but favorites the name Andy) who serves drinks here showed me where to find the hole; in the north wall, where floor and wall meet.
She also had a idea. The only one that has the right size was...a talking mouse. Believe it or not, but I happen to know one; Sherry. I said goodbye and used the Orb of the Moons to get back at the castle.
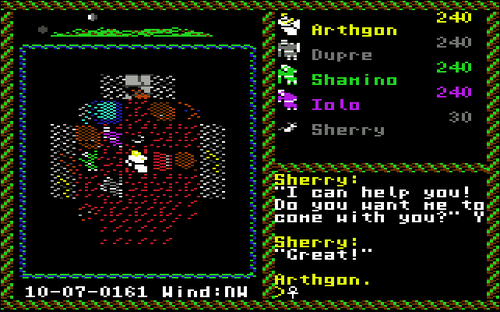
Inside the castle I let the healing powers of Lord British heal me and walked around until I bumped into Sherry, the talking mouse again. I asked her for help and because I already gave some cheese she was willing to join the group. It is also time to get some a rest.
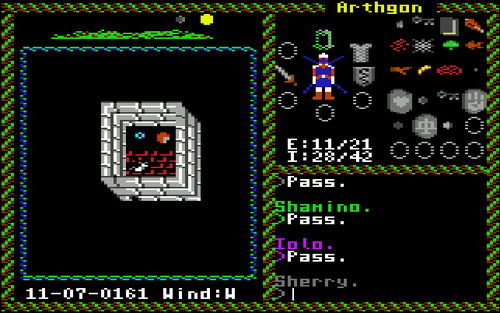
Returning to Jhelom went pretty easy and in no-time I was inside the The Sword and Keg again. Thanks to the size and nimbleness of Sherry I also have the Rune of Valor now. (not to mention a cheese and an Invisibility Ring, but I let Sherry keep them as a gift) It is now time to free another Shrine.
Intermezzo: Solo or Not to Go Solo?[edit]
There are some major differences with the PC and the C64 versions. One of them is that the fact that you cannot go into the solo mode. That is why you have to use the attack mode ((B)egin Combat) to unlock the full potential of the size and nimbleness of Sherry to get the Rune of Valor.
Intermezzo: The Sword and Keg Sign[edit]
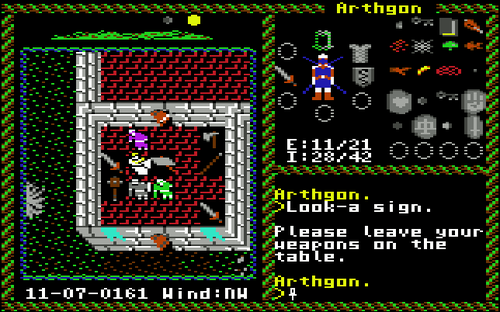
At the entrance of the pub I saw something that I find very interesting. Why having such sign that notify that you have to leave your weapons behind on the table when YOU and your companions can just can walk in WITH your weapons? Seems to me that this rule does not count for the Avatar and his companions.
Shrine of Valor[edit]
To get to the southernmost of the Valorian Isles where the Shrine of Valor is located, I "borrowed" the free skiff that I found at the southern dock of Jhelom. That's near the Town Hall and Naughty Nomaan's shop. And yes, I took it because I did not had the money to buy a skiff or a ship, okay? Being an Avatar does not mean that everything is for free. Well...huh...if you not count all the stuff that was not nailed down.
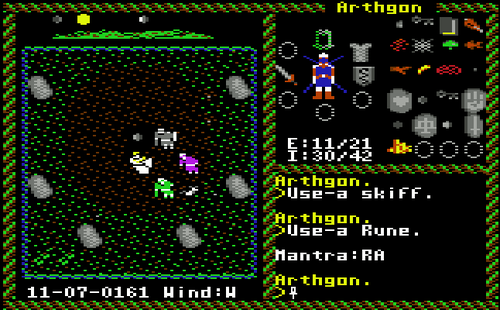
With no enemies in sight, (again? Are they on a strike or something?) I once again knelt down before the shrine, took out the Rune and used it. A mystical voice in my head came to me and asked for the Mantra of Valor; “RA”. Another Shrine has been saved from the clutches of the Gargoyles. Trusting my gut feelings that I need all the Moonstones for an important quest, I took this one as well. Kneeling down before the altar, I heard another mystical voice in my head who told me that "Tender-handed stroke a nettle, and it stings you for your pains." "Grasp it as a man of mettle, and it soft as silk remains."
Minoc: It's no sacrifice at all[edit]
Leaving the freed Shrine behind, I aboard the free skiff and sailed all the way to Minoc. Yes, the Orb would have been a more quicker transportation, but I soon discovered that the immediate area exists out of marshes. And the all-important handbook for Avatars says that THAT give off poisonous gases which can severely harm members of the party. Therefore I could save the red potions for true dangers. Located in the mountainous north of Britannia's mainland, bordering the eastern shore of Lost Hope Bay and situated north of the Bloody Plains this city is dedicated to the virtue of Sacrifice and home of the finest and well-known craftsmen, tinkers and artisans.
The major of the city; Isabella told me that when the Rune of Sacrifice was sent to this city, she entrusted it to Selganor, the guild master of the Artisan's Guild. If I really want to know the the mantra of Sacrifice I have to find Tara who lived on the north side of town. (Wait. Was not it a city?)
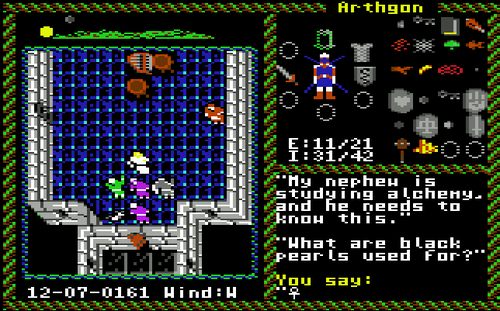
I found him at the Artisan's Guildhall. He greeted me with a question. You see, his nephew is studying and he has to know this one. (the answer can be found in the Compendium and is another copy protection)
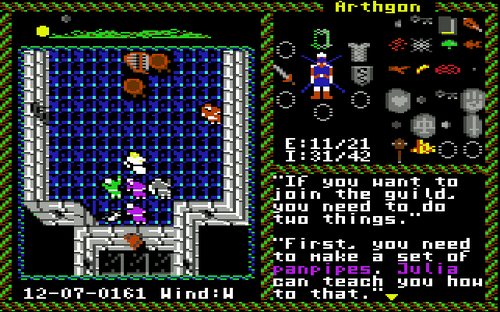
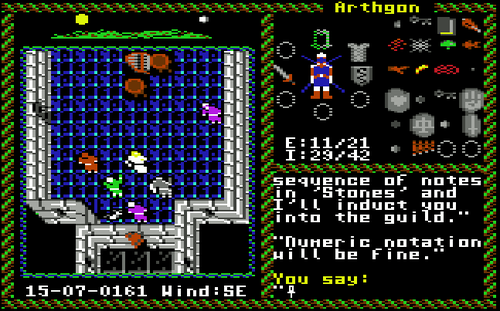
After giving him the answer, I proceed to know more about the Rune of Sacrifice. It seems that the only way to get this important item is to join the guild for only the members are allowed to handle it. To become a member I need to make a set of panpipes, Julia (a long time companion) can teach me that.
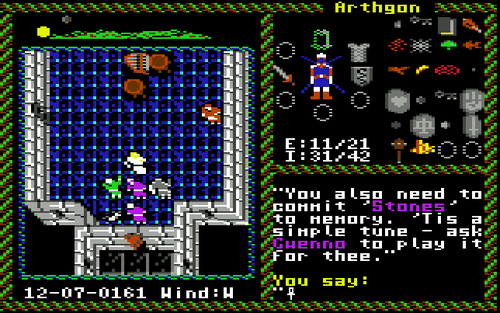
When that is done I also need to commit 'Stones' to memory. Gwenno (a frequent comrade in arms and wife of Iolo) is the one who could teach me the song.
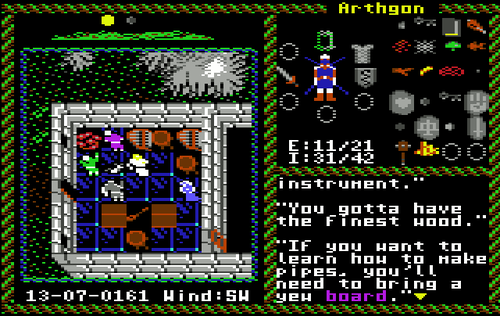
After a good night's rest, I finally found my former companion in a house. To learn to make pipes, I will need a Yew board. Believe it or not, but I need to get back to Yew to buy a freshly-cut yew log and take it to a sawmill. There I have them cut it into a board and bring it back to Minoc. Back to Yew then.
There is only one thing to do before hitting the road back to Yew and that is to visit Tara for the Mantra of Sacrifice. She, a kind and compassionate healer told me that the Mantra for Sacrifice is CAH. As for the healing, she does it for free, because our cause is just.
Intermezzo: Finding your skiff/ship back[edit]
If you are in the possession of a skiff or ship, always and I do mean ALWAYS place it on a recognizable location. I found this out on the hard way and had been searching for a long time to find it back. Not cool.
Yew Revisited[edit]
In the night (yes, that is how long it took to find my skiff) I came up with a devious and ingenious plan that could never fail. (Ohoh, where did I heard that before?) Boarding a sailing skiff, we rowed to the stones where you will end up when using the orb to Minoc and debark. Why? By this action, I really do not need to walk through the marshes and THAT saves red potions. Using the Orb I went back to Yew to get that Yew log.
I found Ben, inside of his little cabin at the woods left of the High Court. Inquiring about the log, he asked me if I want one. I said yes and he sold me one for 5 gold. Let's go back to Minoc to get the log fabricated into the Yew Board.
Return to Minoc[edit]
The sawmill who lies next to the swamps, was easy to be found and there I gave the Yew Log to Aaron who turned it into a flat sanded board for only 5 gold. Without swamp boots it is not a good idea to take a stroll into the swamps, so I took the boat and debark at the other side of Minoc.
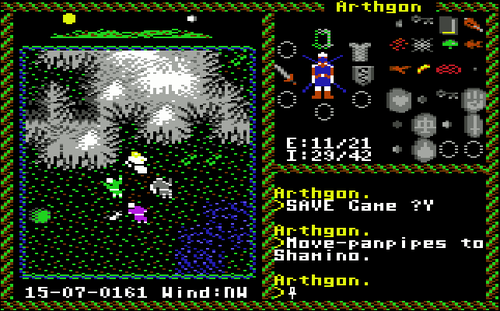
Back at the shop I gave Julia the board. She then started to carve and the rough board slowly turned into smooth rods. Then she hollowed out each rod and pegs them all together. Lastly, she notched each tube and cuts them all to the proper lengths. And there it is....a set of panpipes fit for any bard in the land!
With the panpipes in my possession I went back to the Artisan's Guildhall and spoke to Gwenno to learn to play "Stones" with the panpipes. (and probably learn to get it out of my head again) She gave me that very quickly.
The only thing that needs to be done now is to have a chat with Selganor. First he asked me to show him the panpipes, which I did. Being quite happy to see such quality he proceed to ask me the notations of "Stones". I told him the right sequence of notes and he strums a chord on his lute and taped lightly once on my shoulders with it. Now that I am the full member of the guild of artisans he handed the Rune of Sacrifice to me. It is a long ride, but I still have to get to the Shrine of Sacrifice to free it from the clutches of the Gargoyles.
Intermezzo: Other Way Through The Swamp[edit]
It IS a bit of an oversight by me, but there IS another way, to get through the swamps without wasting red potions and soaking wet feet IF you are NOT wearing any Swamp Boots. Walk east of the house of the mayor until you see a bend in the road to the south. There you will go a little further to the east until you cannot go anymore because of the swamps. At the north you will see some mountains next to the swamps, now go and stand next to the mountains and you can walk safely. FAIR WARNING: You still need to watch your companions for they may still go and wander through the swamps if you are not careful.
Intermezzo: Giving The Swamps The Boot[edit]
It IS advised to get and wear these swamp boots, otherwise you will get very sick and that will cost you precious red potions. Now because the C64 version Utomo does not sell them, you need to get them by using the Get Items Cheat.
One again, you have to talk to yourself and say the following;
I (enter)
want to (enter)
cheat (enter)
Now you have to press 1; Get Items This will allow you to have ANY items in the game. Beware that the C64 Object Numbers are completely different than the PC Version. Instead of 28 to get the Swamp Boots you will have to input 27. Now you only have to need to input the quality and the quantity (how many you want) and all is done.
Shrine of Sacrifice[edit]
Decisions, Decisions, what to do, what to do? There were three ways to the Shrine of Sacrifice; 1) Using the easy way and get there with the Orb of the Moons. 2) Getting there on foot. Then I need to make sure that everyone wore swamp boots, because a large part of the road to/out of Minoc goes through swampland. 3) Sailing away with my free skiff and then walk the rest.
Intermezzo: Ninja Edit: Naming Bug?[edit]
Could I have been wrong after all? This is rather strange, but if you talk with the persons AGAIN you DO see their names now. I am not sure if it is the influence of the fixed populace disks, but it also does the same with the populace disks that I normally using all of the sudden. Or am I just seeing things? If someone else has this as well, please do tell.
