Codex of Ultimate Wisdom

The Codex of Ultimate Wisdom is a magical tome which incorporates all knowledge that exists or has ever existed. It appears in Ultima IV, Ultima V, Ultima VI and Ultima IX.
Description[edit]
Said to hold the "one right and true answer to any question," it always opens itself to the page its reader seeks, and is always able to read what is written in his own tongue. Bound in leather and gold, a sacred seal is emblazoned on its cover – consisting of a set of six lines and five circles. This sigil stands as a representation of the Eight Virtues and three core principles of Britannian and Gargish virtue, which the Codex inspired.
History[edit]
For a transcript of the various messages given by of Codex throughout the series, see: The wisdom of the Codex
The exact origins of the Codex are unknown, but this mystic font of knowledge initially appears to have rested in the Ethereal Void. The great gargoyle seer, Naxatilor, first brought it to the material plane through use of specially crafted lenses and an artifact known as the Vortex Cube, and for many years it was kept in the Gargish Shrine of Singularity – which appeared to humankind to lie at the bottom of the Great Stygian Abyss.[1]
Age of Enlightenment[edit]
Somehow, the sages of Britannia learned of the Codex’s existence, and it became the end goal of the initial Quest of the Avatar, as the newly revitalized realm sought out a philosophical hero who could attain the wisdom of the tome and lead Lord British's people into a new Age of Enlightenment. To accomplish this, however, the questant seeking the Codex would have to undergo a number of trials.
The Stranger who eventually became the Avatar had to first become elevated in the ways of the eight Virtues. Thereafter, the Book of Truth, the Candle of Love and the Bell of Courage, were needed, as well as the Word of Passage before the mouth of the Great Stygian Abyss could be opened. Once inside this vast dungeon, the hero required the Mystic Arms and Armour so as to survive the Abyss' perils, and only after traversing numerous dangers and submitting to tests of understanding of both the virtues and their combinations could the hero at last reach the Codex.
In the years after the power of the Codex returned the newly christened Avatar to Earth, the Great Council acted to draw the Codex from its resting place beneath the Britannian soil to the surface, where it was brought to rest in the Shrine of the Codex. For years, two giant, enchanted Stone Guardians stood athwart the path leading to the sacred book, barring entry to all who were not on a holy quest.
The act of the Codex’s removal from the Shrine of Singularity was later attributed by the aggrieved gargoyles to the Avatar – whom they knew as the "False Prophet" described in their eschatology. The loss of their sacred tome, coupled with the slow collapse of their homelands after the destruction of the Underworld led the desperate Gargish people to war upon Britannia, hoping to thwart the prophecies of their civilization's destruction. In time, the Avatar would learn of the unintentional suffering that had precipitated and would broker an end to the conflict between the two peoples by returning the Codex to the void, creating new lenses such as that the book could still be read by humans and gargoyles alike.
Age of Armageddon[edit]
By the time of the Avatar's last travels in Britannia, the Codex had been returned to Britannia through unknown means, apparently having been returned to the physical realm some time before the Great Cataclysm. Somehow, the magical properties of the Codex had somehow been altered in its passage through the planes, as it now required the use of both lenses to decipher – even though it existed as a material artifact.[2]
During the course of the hero's final battle against the Guardian, it was revealed that the Codex had somehow found its way into the hands of Samhayne of Buccaneer's Den. The pirate lord attempted to use the book as leverage against the Avatar, in order to pressure the hero to ritually cleanse the magical column which had arisen near New Magincia, as its influence had led to tempestuous whirlpools which were interfering with local trade. After accomplishing this, however, the returned Lord Blackthorn captured the hero when meeting with Samhayne and seized the Codex for himself. It was later retrieved by Lord British when the aged monarch slew his former regent in the depths of the Abyss.
After at last assembling the lenses and returning the Codex to its shrine, the Avatar learned the final ritual so as to join with the Guardian and thereafter ascend.
The Symbol of the Codex[edit]

The symbol on the cover of the Codex is an emblem which represents the Eight Virtues and how they related to the three principles of Truth, Love and Courage. At times, the colors traditionally associated with the virtues are also incorporated into this symbol, providing additional means to portray in the intermingling of these concepts.
The three circles at the center of the hexagram represent these principles. The three lines which touch the border on one circle each represent the virtues of Honesty, Compassion and Valor – as each of these are derived from a single Principle. The three lines touching on two circles each represent Justice, Sacrifice and Honor, which all derive from the combination of two Principles.
The small circle linking the three circles in the figure's center represents the virtue of Spirituality, which is derived from all three Principles, and the outer circle which touches no circles represents Humility, which exists independently of the Principles.
Trivia[edit]
- In the original design documents referred as the Bob White plot, Time Lord is revealed to be the creator of the Codex.
- In Ultima IX, while the in-game Codex item features on its cover the Codex symbol overlaid on a cross pattée, the tome is missing the symbol when shown in the pre-rendered cutscene of the Avatar's ill-fated meeting with Samhayne, displaying only the cross.
- The cross pattée on the Codex depicted in the cut scene of Ultima IX closely resembles the design of the back cover of the Lindau Gospels, which is estimated to have been created around the 8th century (AD 780-800).[3]
Gallery[edit]
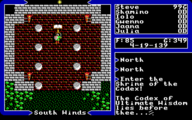
The Codex in Ultima V

The Codex in Ultima VI
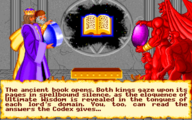
Both kings reading the Codex at the ending of Ultima VI
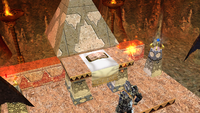
The Codex as seen in Ultima IX
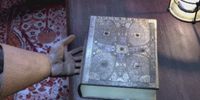
The Codex in an Ultima IX cutscene
The Codex in the introduction of Ultima V: Lazarus


References[edit]
- ↑ Naxatilor. Kodeks Rit (Ultima IX – in-game).
- ↑ Mueller, Tonda. "Places of Note". Journal (Ultima IX: Ascension). Origin Systems, Inc.: 1999. Page 24.
- ↑ O'Driscoll, Joshua.. "Book as Treasure". Lindau Gospels. The Morgan Library & Museum: n.d..
External Links[edit]
- Ultima IV Ending (YouTube) – The Avatar discovers the Codex
- Ultima IV Ending on NES (YouTube) – The Avatar discovers the Codex