How to Play
This short playguide will cover the main User Interface and general usability. As a multiplayer cooperative online role-playing game, how you choose to play is a personal choice.
Getting Started[edit]
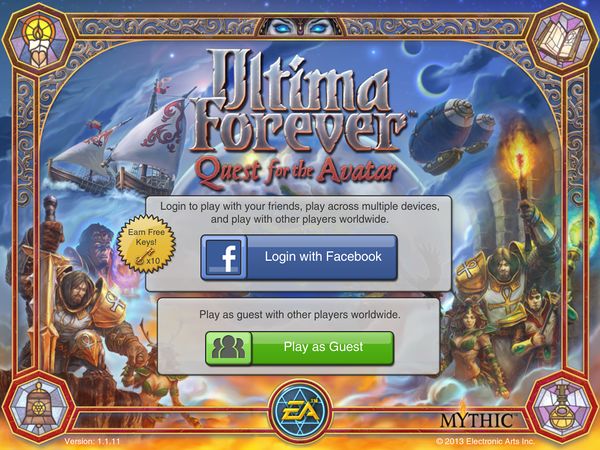
Upon starting the game, you have the choice to connect Ultima Forever to your Facebook account, or log in as a Guest. Linking to your Facebook account provides two benefits: you can log into the same account on any device and continue from your current location, and you will be awarded 10 Gold Keys. Playing as a Guest allows you to advance characters from the current device, but you will not have access to those characters from any other device. If you have not yet linked to your Facebook account, choosing to do so at a later time will allow you to carry your characters created on that device with you, granting you access to them from anywhere.
After logging in, you will then be shown a brief introductory video. You can tap anywhere to skip this video for future logins.
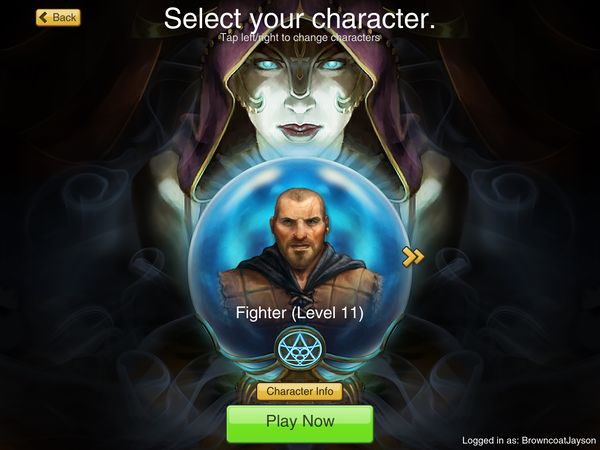
On the main screen, you can choose your character, create a new character, or see information about your account. If you have not yet created a character, tap the crystal ball to do so. Tap the double arrows to switch to a different character slot. Tap the Character Info button to display class information and starting Stats. Tap Play Now to start the game with the currently selected character.
Main Window[edit]
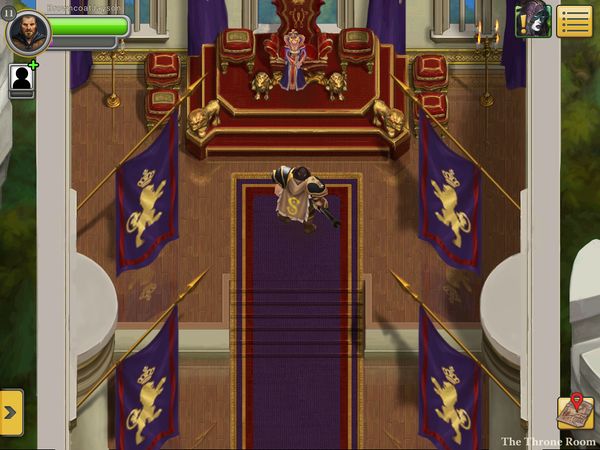
This is the main window of the game. Tap anywhere to move to that location, or tap and hold to continue movement in that direction. As you approach objects, locations, and characters, labels can be revealed. Some are simply names of characters and locations, while some are description of the objects and world around you.
Characters with a quest to offer are signified with an exclamation mark over their heads: if the mark is gold you can obtain their quest; if it is tan you are not yet high enough level to perform the quest, and if it is blue with a circle about it, you have completed the quest but can repeat it. Occasionally, characters or bjects will have a U4E logo above their heads; these are part of your Avatar quest, and will help you advance in the game.
User Interface[edit]
Let's take a look at the various parts of the interface:
In the top left corner of the screen is the Player Information window. This displays your character's image, a bubble with your level, and bars for your Health and Virtue. As you are hurt, your Health bar will decrease, turning from green to yellow when wounded, to red when seriously wounded. Your Virtue bar will increase as you earn Virtue toward your next level. Tapping on the Player Information window will display the Character window.
Below your Player Information window is the Group icon. Tap this icon to search for a random group member. Once someone has joined your group, their image will replace the Group icon. You can have up to three others players in your group. Players can also be added via the Social panel.
At the top right of the screen are icons to access the main User Interface windows. Tap the Gypsy icon to display the Quest window, or tap the page to display the Menu.
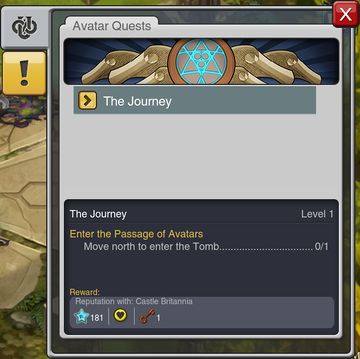
The Quest window is split into two tabs. The first, with the U4E logo, contains the Avatar Quests you are currently working on. The second, marked with an exclamation mark, contains a list of all Side Quests you have been asked to complete.
Tap on any quest to see the description of the quest. Quests can advance several times between first being given and final completion, so its handy to check your Quests from time to time.
- Tip: Although you must have a quest assigned to be rewarded for kill or discovery type quests, you can collect items and return them to those who desire them even without the quest. You will still be awarded any Virtue, Reputation and Keys you would have gotten, had you first obtained the quest.
From the Menu, you can access the player windows. The first icon will display your Inventory window; the second the Character window; the third the Shop; and the fourth the Settings. While in a dungeon, a fifth icon will be shown, allowing you to quit the dungeon before its completion. To close the Menu, tap the "X" icon at the top of the list.
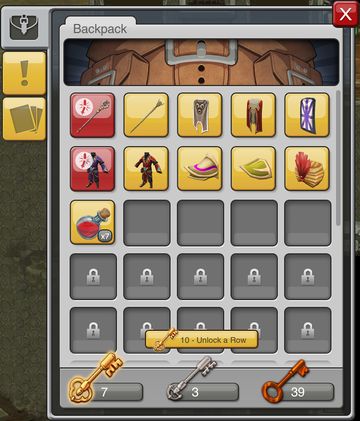
The Inventory window is split into three tabs. The first is your Backpack, which is where all of the equipment and items you gather is stored. The second tab is for quest-related items. The last tab shows all of the Tarot Cards you have collected. Each of these windows functions similarly, although with different number of available spaces and what items are contained on each. Tap on an item to display details about that item.
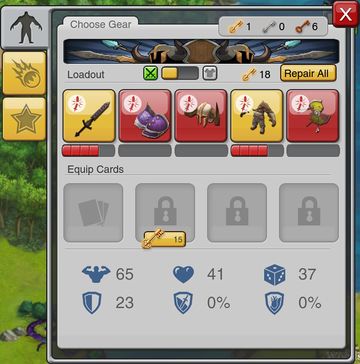
The Character window is split into three tabs as well, but each is unique. The Gear page, above, is shown on the first tab, and contains your character's Stats and gear. Each player can wear five types of items: A Weapon, a Shoulders piece, Head gear, a Body suit, and a Back piece. Gear is divided into your Loadout, which is what provides you stats, and Clothes, which affects your appearance. Tap the switch above the gear slots to toggle between these sets. Items in your Loadout can be damaged as you adventure, and are displayed with a "Damaged" indicator in addition to the shrinking durability scale below of each icon. Gear can be repaired individually for Silver Keys, or the entire Loadout can be repaired at once for an equivalent cost in Gold Keys.
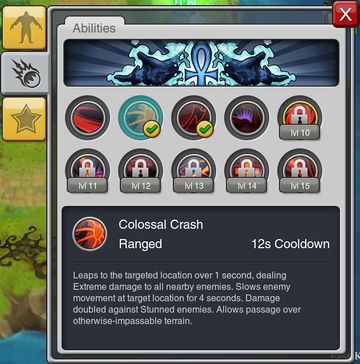
The second tab of the Character window is the Abilities page. Characters begin with one ability, and others are earned during level advancement. Tap on an icon to see information about the skill or spell. You can tap on a space on your Skill window to assign the currently selected skill to that space.
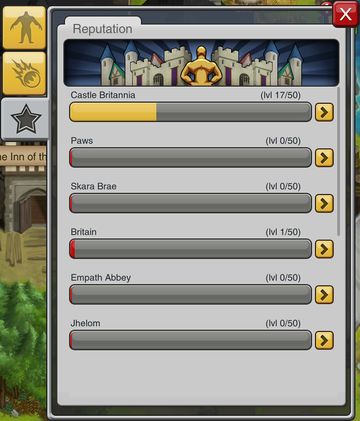
The last tab on the Character window shows your character's Reputation with each town. Your reputation affects what equipment you can wear, as well as limiting what Quests you can obtain. It is important that an Avatar focus on achieving Paragon level reputation with each town in Britannia.
The Shop is the method that Ultima Forever is monetized. Players can purchase Silver and Gold Keys for cash using In-Game Transactions, in addition to the means of obtaining keys during play. Free Gold Keys can be obtained by taking advantage of offers through Burstly. Finally, players can convert Bronze Keys found throughout the game to Silver Keys at a ratio of 15 Bronze to 5 Silver.
- Tip: It is possible to obtain keys from Treasure Chests; Bronze Keys are Common items, Silver Keys are Uncommon items, and Gold Keys are Rare items. Therefore, converting Bronze Keys to Silver Keys, and then using them to open the Forever Chests found in most cities, can be a method of obtaining free Gold Keys.
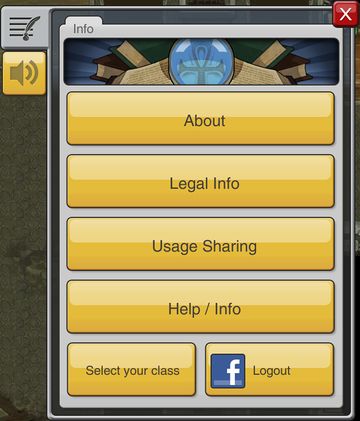
The Setting window provides access to come generic information, including information about the game, legal information such as the End User License Agreement and Privacy Policy, an option to enable or disable Usage sharing information, the credits, Frequently Asked Questions, and access to support. The second tab allows you to control the volume of various sound effects to optimize your audio experience.
The Skills window is shown on the left side of the screen while in dungeons, or while viewing the Abilities page of the Character window. Players begin with one skill slot, and can purchase more as they gain additional levels. Skill slots can be unlocked temporarily (for one dungeon, in exchange for Silver Keys), or forever (in exchange for Gold Keys). Additionally, an Ultimate slot is gained at tenth level; this always provides access to the character's Ultimate skill (also gained at tenth level).
Abilities can be places in a Skill slot from the Character window. Activating an Ability is then just a matter of tapping the icon. Some Abilities are Melee, which when activated will affect enemies and objects immediately in front of (or sometimes, anywhere near) the player. Other Abilities are Ranged, which require the player to then tap a target. If an enemy has already been tapped to select, double-tapping a Ranged Ability will automatically activate it on that target (as long as they are not blocked by obstructions). A few Ranged abilities only work if an enemy has already been targeted, and do not allow you to target manually.
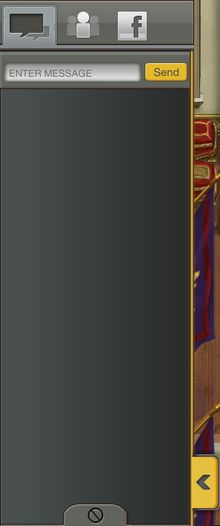
Tapping the yellow arrow in the bottom left corner of the screen will display the Social window. On this window, the Chat pane will allow you to view messages from other players, and send your own.
Click in the "Enter Message" field to display the standard virtual keyboard. Note that you can send a "Global" message, which appears to all players in a given area, a "Group" message that only appears to the other players in your group, or a "Tell" message that is directed to a specific player.
At the bottom of the Chat pane is an icon to add exclusions, which then causes you to ignore anything a specific player does.
The Friends pane shows all players that you have befriended. You can manually add players by entering their name, or by adding your friends from the third Facebook pane of the Social window.
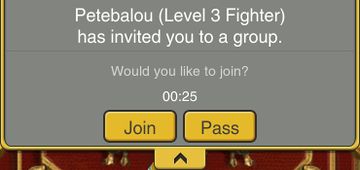
When you are invited to join a group, an Invite window will appear from the top of the screen. You can join their group by tapping Accept, or tap Decline to dismiss the invitation.
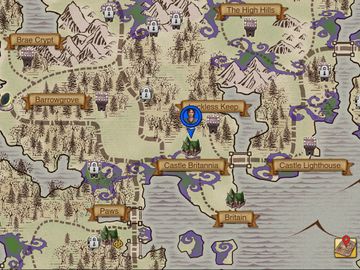
In the bottom right corner of the window, your current Location is displayed. Tapping the icon will show the map of Britannia. Locations will be displayed in the map as you unlock them, through advancing in level or quests. You can quickly travel to a location by selecting it on the map, but Fast Travel costs two Silver Keys.
While in a dungeon, the Location is typically hidden and instead your Potions are displayed here. Tap the icon to consume a potion and heal your Avatar.
- Tip: Unless you are stranded in a part of the world where travel is onerous, such as Magincia, the map of Ultima Forever is simple enough to navigate that Fast Travel should be a rarely used extravagance.
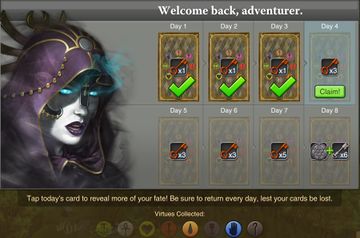
The Daily Login Bonus window is displayed once each day. The Gypsy reveals your fortune by showing a Tarot Card and giving its meaning, and you earn Daily Rewards.
