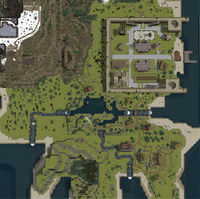
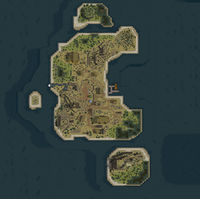
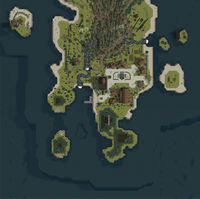
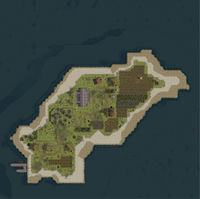
The Ultima 6 Project walkthrough
This is an Ultima 6 Project-related article or section. The information within may not apply to Ultima VI or other Ultima games.
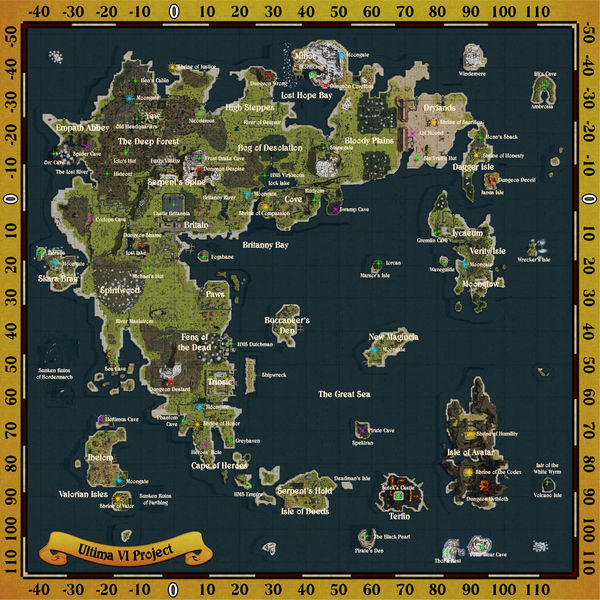
This walkthrough for The Ultima 6 Project tries to give a complete overview of all the aspects of the game, including tips on various topics like the party and equipment, a detailed main story walkthrough and solutions for all side-quests.
Areas of Importance[edit]
Party Members[edit]
The choice of party members is very important. That means you have to choose wisely for they have certain restrictions, according to their class. Fighters and tinkers are forbidden from using magic weapons and armour, bards and rangers cannot use heavy weapons or armour (but magical is allowed), druids can only use blunt weapons (and no magic swords) and only leather armour (but are allowed to use magic armour).
Your first three companions will never leave. Surprisingly, the choice of characters is easier than you can think, since all the characters that can join while you are stuck on the mainland (minus Blaine) are good characters and make your party well rounded. In contrast, the later NPCs are behind the rest due to having less experience at that point. However, you should only have a seven-man party since on occasion you will need the eighth slot for temporary characters, and much later, Beh Lem fills it permanently.
The party therefore should consist of the Avatar, Iolo, Shamino and Dupre as set characters. Jaana is an excellent addition, since she is the strongest NPC spell-caster in the game. Gwenno is basically the same as Iolo and therefore has his exact strengths. Julia as a tinker is strong in battle (but has no magic) and therefore can be a front liner. Late in the game, Beh Lem can deal considerable damage (and you need to have him).
Almost all other characters found outside the mainland are of a fighter class or subclass and therefore forbidden from using magical equipment, another reason to avoid them. Mariah only becomes available too later in the game, and despite her strong magical abilities, can barely defend herself in combat.
Weapons and Armour[edit]
Generally, magic arms and armour are more superior to their non-magical equivalents. All your characters should strive to have the following equipment, with the exceptions listed below:
- Swamp boots: protect characters from Britannia's many poisonous swamps. They also offer with +2 armour a good protection. Utomo in Yew sells them.
- Magic armour and helmets: the best protection available with a rating of +10 for the armour, +5 for the helmet and +5 for the shield. Brandon in Trinsic sells them. The magic shield, however, can only be found at various locations.
- Spike collars: these offer extra protection of +2, and bought once from various blacksmiths.
- Protections rings: These provide +5 extra armour. They are strewn throughout Britannia, and have to be found.
- The choice of gauntlets depends entirely on the class. Some classes have to use leather ones, instead of metal ones. Beh Lem cannot wear them at all.
- Magic sword: the best melee weapon with a rating of 24 - 30, they are common in Britannia's dungeons, and one can be found west of Lost Lake.
- Magic bow: the best ranged magical weapon in the game with a rating of 16 - 20. They can be bought in Britain from Gwenneth.
There are several exceptions to these rules:
- Avatar
The Avatar should get the Mystic Armour and Mystic Sword from the Lycaeum. Later, switch to Enilno, which you find in the dungeon Hythloth and is the best melee weapon in the game. Additionally, the storm cloak, which negates enemy spell casting, should be obtained from Mariah at the Lycaeum. Note that the storm cloak has a limited amount of anti-magic power, so only equip it for short periods of time.
- Julia
As a tinker, Julia is restricted to use non-magical weapons and armour, with the exception of the magic bow. The best possible equipment for her is plate armour (+7 armour), a great helm (+4 armour), a tower shield (+4 armour) and a halberd (15 - 30 damage) as a weapon, which can be bought at Serpent's Hold.
- Jaana
Jaana as a druid is restricted in her weapons usage, as she is not allowed to use bladed weapons, only blunt ones. The hint-book is wrong – Jaana cannot wield the two-handed hammer (12 - 20 damage). The best weapon she can wield is the mace (9 - 15 damage).
- Mariah
Mariah as a mage is even more restricted in her weapons usage. Equip her with a two-handed staff or a magic bow, and use her massive intelligence stat to decimate enemies with Kill or Death Wind. She only becomes available in the late-game, after obtaining both halves of the silver tablet.
As a mouse, Sherry cannot use any weapons aside from wands, and cannot wear any armor. She makes up for this by being the fastest character in the game, and her small size allows her to block almost any non-magical attack. She can thankfully wear up to four protection rings and can withstand some damage after she levels up at the Shrine of Valor. Use her as a scout or as a decoy for enemies to swing at while your party members attack from behind. As a mouse she has a small chance to poison enemies.
- Beh Lem
As a gargoyle, Beh Lem faces severe restrictions. He can use a magic sword and keep his boomerang as a distance weapon. He can wear a spiked collar and up to four protection rings for added protection.
For more details on the equipment, see Equipment locations in U6P.
Magic[edit]
Magic is surprisingly complicated issue.
For the initial part of the game on the mainland, you have little need of magic since you are too weak to survive the dungeons, and the only spells you need are healing and Cure, as well as the unlock magic spell. You should however use the time to collect numerous reagents and higher level spells to fill your stores.
Generally, all characters capable of magic should have a spellbook in order to cast the most basic spells (Heal, Cure, Unlock Magic, Light) so that they free up your main spellcasters, who can save their mana for more important spells. The Avatar and Jaana should be your main spellcasters as they are allowed access to all spell levels, while other characters have limitations to which circle they can reach. These two should learn all spells possible.
The eighth circle spells from Xiao only become available once you are that level and fulfill her quest (see side-quests).
The following spells are essential:
- Awaken – to counter Sleep (concept)|sleep]] spells
- Cure – absolutely essential, since poison is everywhere
- Dispel Magic – since possession is troublesome with which to deal
- Light – at least until you get the superior Great Light. Britannia's dungeons are very dark
- Heal
- Telekinesis – creates important shortcuts
- Unlock Magic – absolutely needed, also access to many treasures
- Untrap – since traps are everywhere
- Dispel Field – considering the sheer number of magic fields, you do need this
- Fetch – nice to get some hard to reach items
- Great Light – this light spell is much more useful in dungeons and lasts longer as well
- Peer – very nice to replace peer gems, and lights up dungeons even more
- Pickpocket – needed to solve the Phoenix quest, also nice to get good stuff
- Reveal – since some enemies (liches) love to go invisible, having this is necessary
- Seance – needed to solve the Skara Brae quest.
- Invisibility All – essentially makes your party invulnerable to any enemy that cannot cast Reveal. Particularly useful if cast by a character wearing a storm cloak
- Enchant – allows your character to charge an uncharged staff (purchased from Nicodemus) that casts Invisibility All or Kill 10 times for the price of a single set of reagents
- Kill – this is the ultimate spell to kill enemies with less than 200 hp with one blast
- Death Wind – the ultimate spell of this game. One casting destroys huge groups of enemies with less than 200 hp
Reagents[edit]
Finding reagents is essential in the first half of the game to conserve your money. There are numerous places where harvesting regents is especially easy, and all reagents re-grow after a day so that they can be harvested again. The Compendium is good place to keep track of where large stocks of reagents were found.
- Cove Area
The area around Cove is rich in ginseng and garlic. Ginseng can be found around the ettin camp east of Rudyom’s house. Garlic can be found along the coast, just a little west of the Swamp Cave. More ginseng and garlic can be found a little north on the plateau that runs parallel to the pass that leads from Cove to Minoc. Beware of the nearby headless.
- East of Yew
Just a little outside the eastern gate of Yew there is a respectable patch of blood moss on the forest floor ready to be harvested.
- Spider Cave
The Spider Cave south of Empath Abbey holds a huge amount of spider silk, just do not expect the giant spiders to give it up without a fight. Killing the spider queen nets you 500 of the reagent.
- Beach North of Skara Brae
The long beach north of Skara Brae houses numerous oysters with black pearls just waiting to be picked up.
- Beach West of Trinsic
The big beach far west of Trinsic holds an even larger cache of black pearls and is even easier to reach.
- A Bit West of Trinsic
Just a bit west of Trinisc and up one mountain level, a huge cache of blood moss and ginseng can be found (you need to look around a bit to find all of it). This one can be easily missed because of the confusing terrain, but you can reach it by first looking north from the lake to find the small path that leads deeper into the mountain/forest.
- Spektran
Spektran is the big haul. After you have got rid of the initial inhabitants of hydrae, the island is completely safe and houses an obscene amount of black pearls, nightshade and mandrake root. For the latter two reagents, you never need another source for harvesting again (although do so when the opportunity arises). Just remember to only harvest from 23:00 - 1:00 when the plants are glowing blue, otherwise they are worthless.
- Terfin
Terfin is littered with caches of sulfurous ash, just be careful with the monsters there.
- Volkania
The lone volcanic island Volkania southeast of the Isle of the Avatar holds the largest amount of sulfurous ash, but you have to deal with the drake that inhabits the island first.
Best Vendors[edit]
Nonetheless, sooner or later, reagents have to be bought in bulk to make up for the increase in spellcasting later in the game. There is no discount for buying in bulk, all prices are multiplied from the price for a ten reagent package – single reagents actually cost more. Each reagent has one vendor who has got the best price. Note that Zoltan is always moving and is thus not listed. If one takes the trouble to actually find him, his prices are the best for all reagents he has to offer. The following best prices are for packages of ten (the 50 and 100 packs are the price for ten just multiplied by five or ten).
- Black pearl: Joren, 140 gp
- Blood moss: Horance, 100 gp
- Garlic: Joren, 50 gp
- Ginseng: Nicodemus, 78 gp
- Mandrake root: Horance 320 gp
- Nightshade: Joren, 200 gp
- Spider silk: Joren, 90 gp
- Sulfurous ash: Horance, 90 gp
Note that if you disturb Joren's herb garden and/or spiders, his prices go up significantly, so don't do that.
Leveling Up[edit]
Characters can level up by meditating at a freed shrine if they have sufficient experience. Each shrine raises different attributes.
- Honesty – raises Intelligence by 3 points
- Compassion – raises Dexterity by 3 points
- Valor – raises Strength by 3 points
- Justice – raises Intelligence and Dexterity by 1 point each
- Sacrifice – raises Dexterity and Strength by 1 point each
- Honor – raises Intelligence and Strength by 1 point each
- Spirituality – Intelligence, Strength, and Dexterity by 1 point each
- Humility – No raise in attributes
Levels are as follows:
- Level 1: 0 - 199 exp
- Level 2: 200 - 399 exp
- Level 3: 400 - 799 exp
- Level 4: 800 - 1599 exp
- Level 5: 1600 - 3199 exp
- Level 6: 3200 - 6399 exp
- Level 7: 6400 - 12799 exp
- Level 8: 12800+ exp
Making Money[edit]
One of your biggest concerns will be to make money. After all, the stuff you need to buy will cost you a fortune. There are several ways to fill your coffers.
The straightforward way of course is through fighting, since enemies, especially the humanoid ones, often have gold with them and it quickly adds up. Fighting also gives you the gear of the enemies (when humanoid), which you can sell at the next blacksmith. Just be sure that you do not pick up broken equipment – with brown tags – as these are worthless. Heftimus Cave near Jhelom is a good source of equipment to resell, as the waves of evil fighters leave behind significant gold and good equipment. Please note that things like royal shields and guard chainmail cannot be sold on the open market. For this equipment, Enrik in Buccaneer's Den is your fence because he does not care where your wares came from.
Besides finding money, the other big way to get gold is to sell stuff to the right people. The Royal Mint in Britain is probably your best friend, as you can sell them all your gold bars, gold nuggets and gems, which will quickly add up to a considerable sum. Another profitable endeavor is to sell peer gems to provisioners, since the price for a single gem is quite high. The wine vendors in Empath Abbey and Skara Brae also buy the other's specialty wines for a considerable sum.
There are also two one-time ways to make money:
- Play nim with Dr. Cat in Paws. The trick to the game is that you can only win when you are the one to take the first stone, meaning that you should bet the maximum when you have the first turn, and the minimum when Dr. Cat plays first. The correct number of stones you should take at each turn is always 1 - 3 - 2. After you have won several thousand gold pieces, Dr. Cat will admit defeat.
- After you have reached the Lycaeum, you should talk to Xiao about the eighth level of spells. Retrieve the Book of Lost Mantras from the library and go to Spiritwood. Talk to the Xorinite wisp there and exchange the information in the book for gold, which you can exchange at the mint. That is worth several thousand gold pieces.
Battle Tactics[edit]
Simply charging into battle is suicide, and different creatures require different tactics, or you will find yourself deceased. While most of the weaker monsters can be simply beaten in melee combat, others require techniques that are more refined to survive the encounter.
Reapers: thanks to their magical abilities, these creatures are especially dangerous and appear very early in the game. On distance, they either hurl lightning at you or charm party members. To counter this, avoid them until you have the storm cloak, which negates all their magic. Their melee abilities are devastating as well, so instead use concentrated bow fire to attack from a distance. This makes reapers actually very easy kills, since they cannot move.
Daemons and liches: these monsters use their magical abilities that can destroy you from afar or possess you. Thankfully, you normally will not meet them until after you have acquired the storm cloak from Mariah. While a liche is now done for, this still leaves the daemon's powerful physical attacks, so use your magical bows to destroy them from a distance and run further away, if the daemon approaches.
Drakes and dragons: these monsters thankfully prefer melee attacks than using magic, so the cloak is not needed. However, they have strong physical attacks, so avoid engaging in close combat and use concentrated bow fire. Still, their fire breath does hurt. Once you are of high level, avoid battles altogether and use the spells Kill and Death Wind to avoid severe injury. There is also the danger of elder wyrm dragons who do use magic a lot, so wear the storm cloak for them. Their hide is so thick, that physical attacks are useless, so use multiple Kill spells to kill these beasts. Beware of the daemons they have summoned beforehand.
Gazers: one of the most dangerous enemies in the game. You need to wear the storm cloak to negate their magic, or they critical wound you with lightning, but this helps little since they will then charge the party and unleash powerful physical attacks. The best method is to weaken them with bow fire and then destroy them in melee. Later on, use the spell Kill. Larger groups can be rapidly fatal.
Gargoyles: you only meet these as enemies in the first third of the game, but that makes them more dangerous due to your lower stats. They guard the shrines, and will swarm the Avatar when approaching too close. To prevent that from happening, equip your party with bows and carefully lure the gargoyles away from the shrine so that you can kill them one by one. The winged ones also cast spells, so only attack them when you are sure you will not be swarmed by wingless ones.
Corpsers: corpsers are dangerous, since they can surprise the party and do massive damage with their attacks. Thankfully, once you do know where they are, you can just stay out of their range and easily kill them with bows. No melee, as that would probably cause deaths in the party due to their strong attacks.
Slimes and acid slugs: while the former is poisonous, the latter can destroy non-magical equipment. They also split after being killed the first time. You can prevent them from splitting by attacking them with torches or magical fire. They can be defeated the slow way; destroying them one by one with bow fire and retreating when needed. If you have enough Cure potions or garlic and ginseng, equip each of your party members with a torch and have at them. Just be sure to save ahead of time, in case one of them dissolves one of your party members' non-magical armor. If an Invisibility ring is in possession, place a powder keg in the middle of the foes and ignite it with bow fire. Later, the double usage of Death Wind can wipe out even the biggest groups.
Ghosts: ghosts are weak by themselves, but when they appear in large groups they rapidly become fatal to a party, since they can very quickly drain one person to death. A storm cloak negates their danger, but if that is not available, luring the ghosts one by one into concentrated bow fire is an efficient route to victory.
Giant ants: they always attack in big groups and can poison the party. Since they are fast, bow fire will not be useful. The best solution would be, to wait until the Avatar is level 8, and then destroy big groups with Death Wind to prevent costly battles.
Using the Compendium[edit]
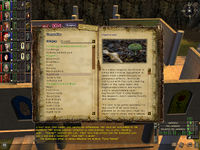
Using the in game Compendium is something that not only is advised but absolutely necessary during game play. The Compendium not only holds much important information, it also auto-updates the progress on the various quests in the game. Without this feature, the danger of forgetting the various quests is very high. In addition, a lot of information, which is not explicitly spelled out in the dialogue, is found in the Compendium, like the harvesting time for nightshade and mandrake root, the effects of spells and information on various locations.
Completely reading the Compendium at the start is highly recommended.
The Main Quest Walkthrough[edit]
This walkthrough goes through all the steps needed for the main quest. Side quests are listed separately. Everything is presented in a linear fashion, but often multiple objectives are pursued simultaneously. It is important to explore out of the way areas to improve equipment and experience. The order in which you free the shrines is mostly up to you. The only rules are that Compassion needs to be the first one and that all mainland shrines need to be cleared before the remaining three can be reached.
Compassion[edit]
For a map with labels, see: Cove – The Ultima 6 Project map.
You go right into battle after being rescued from the gargoyles, but everyone in the throneroom will help you. After that is done, talk with Lord British about all topics and let him heal you. Talk to Nystul next, who will tell you to show the Book of Prophecies to Mariah at the Lycaeum to get more information. Also on his insistence, show the Orb of the Moons to Lord British to be able to use it. Afterwards, get your equipment from your room in the castle and take all useful equipment from the castle itself. Once you are ready, talk to Geoffrey in the throne room to get teleported to Cove, the site of the most recent battle.
You arrive at the remains of a battlefield, and the Shrine of Compassion is surrounded by a force field. Quickly help Ava to move the wounded survivors to the healer. Leona, who takes care of the Temple of Virtue, warns you that the gargoyles have invaded the temple. Talk to the wounded soldiers first before you deal with the problem. Each character should have the best possible equipment and many yellow potions in their possession before entering the temple. The party is ambushed inside and the doors are locked. The battle against the gargoyles is not easy, but with enough potions, it should be manageable.
When you win, a winged gargoyle appears and tries to attack you, but the arrival of guards lead by Wyburn chases the creature away. Talk with your companions about the orb that the gargoyle used. Cove is safe for now, so return by foot to Britain. Talk to the guard at the drawbridge of the castle to lower it, so that you can now enter and leave it as you please.
For a map with labels, see: Britain – The Ultima 6 Project map.
Your mission for the time being is to free all of the eight shrines of virtue from the Gargoyles. To do so, you need the mantra and the rune for each shrine, which can be found in the city that embodies said virtue. Once you have these two things, it is easy to free the shrine. You actually need to free the five shrines on the mainland first, since Arty the shipwright will tell you that you cannot get a ship (they are all used by the government) until the situation on the mainland has de-escalated.
Since you start in Britain, the city of Compassion, and Lord British has told you that the mayor knows more about the situation, go into the town hall and talk to Lord Tholden about it. He tells you that the bards at the conservatory have both the rune and mantra. The conservatory is just across the street, so talk to the bards Kenneth and Nan, and they will gladly tell you the mantra "MU" and explain, that their young student Ariana has the rune. The young girl however will not give it to you until you got permission from her mother. So visit Anya in the Blue Boar Tavern and get her permission, which will make Ariana release the rune.
Now return to Cove and use the rune near the shrine to free it. Take the moonstone you find on it and use it on the damaged moongate of Britain to repair it (keep the stone!). Then give Lord British a report of your success.
Justice[edit]
For a map with labels, see: Yew – The Ultima 6 Project map.
Next, go to Yew, the city of Justice, since it is closest to Britain. Just stay on the path, since the forest is crawling with creatures who would love to bring you to an early grave.
Once in Yew, go directly to mayor Lenora and ask for the rune and mantra. She readily gives you the mantra "BEH" (although she wonders how you could forget it) but tells you that the thief Boskin has stolen the rune from the grave of the previous mayor. Despite him being captured, the rune is gone. That of course makes things a bit more complicated. Trying to talk to Boskin, who is in the high-security cell of the prison, does not work, since Pridgarm will not let you in without permission. Ask permission from Lenora and get the key from the warden. That finally enables you to talk to Boskin, who gives you the sad tale of why he robbed the former mayor's grave. Go to Lenora, who dismisses his story outright. Return to Boskin, who will confess to you, but still wants security for his wife Ibbie and daughter Jessa.
Talking to Lenora yields no result, so afterwards talk to his wife and daughter, who are found on the field west of Utomo’s forge. Then talk with the purple-clad female druid named Riona at the druid circle. She promises to take care of the problem, so return to Boskin, who tells you that his neighbor Witton has the rune. Witton gives it to you. While you now have everything for the shrine, you should first listen to Witton's story about Lenora. You now have to talk to the prisoners Essian, Strom and especially Taliesin, the male druid. Finally, talk to Riona again, before you talk to Lenora a final time. She finally understands that in her grief over her predecessor, she has lost sight of true Justice, and frees the wrongfully imprisoned people (you can visit all affected people to get responses). That done, return the key to the warden.
Now go to the Shrine of Justice. It is guarded by gargoyles, so be careful when trying to defeat them. Then, use the rune to free the shrine and take the moonstone. Use the moonstone to repair the moongate of Yew. Now return to Lord British to report your success to him.
Spirituality[edit]
For a map with labels, see: Skara Brae – The Ultima 6 Project map.
Skara Brae, the city of Spirituality should be your next stop. It is easily reached as long as you stay on the path in Spiritwood.
When you visit the mayor Trenton, however, you get bad news. The runekeeper Quenton was killed under mysterious circumstances and the rune is lost. As for the mantra, he suggests reading. Search for the Book of Spirituality in town, which tells you right away the mantra "OM". Copies can be found in The Haunting Inn and Trenton's home. Getting the rune will be a bit more complicated. First, talk to Yorl, Quenton's best friend, about the deceased runekeeper. Then go to the house of Marney, Quenton's daughter, while she is at home. During your conversation a poem should come up, in which a basket and a chest are mentioned. When you mention it to Marney, she realizes that the poem meant her hope chest, and allows you to search inside it for the rune. Take it, and promise to return it when no longer needed.
- Important note: You must have freed the Temple of Virtue to complete this step.
Now, getting to the shrine is a different matter, since it is located in the Ethereal Void and your orb is not programmed for it yet. To reach the void, you first need to have at least two working moongates, so that they open up at night. Enter a gate at midnight, when both moons are at equal height in the sky. Additionally, both moons need to be a new moon, which only happens once in a month, so if you are unlucky, you may have to wait 27 days. The Shrine of Spirituality is not guarded, so you can use the rune to free the shrine and take the moonstone without problem. Quickly repair the Skara Brae moongate with the moonstone. Afterwards, report to Lord British.
Sacrifice[edit]
For a map with labels, see: Minoc – The Ultima 6 Project map.
Getting to Minoc, the city of Sacrifice, from Cove will not be difficult, just be sure to stay on the road and you will just have to deal with headless. Leaving the road will result in ugly meetings with bandits and tangle vines.
Once you are in Minoc, go straight to the mayor Isabella. She tells you that Selganor of the Artisan's Guild is the appointed runekeeper and reveals that the healer Tara knows the mantra. So visit her first and she tells you the mantra, "CAH" right away. Next, go the guildhall and talk to Selganor. He will only give you the rune once you become a member of the guild. To become one you need to play “Stones” on a set of special panpipes to him. To get the panpipes, you first need a board made from a Yew log. Therefore, you have to return to Yew. Find the lumberjack Ben north of Yew and talk to him during working hours to get a Yew log. Take the log to sawmill in Minoc to get a board made by Aaron. Take that board to Julia, who by that point should already be in your party, and let her make a set of panpipes from it.
Next talk to Gwenno, who also should by now be in your party by now. Let her tell you the correct notation for “Stones”. Better practice the song until you can play it perfectly. Go back to Selganor while he is in the guildhall and demonstrate your panpipes skills to him. He will release the rune to you. Now you have both the rune and the mantra. The Shrine of Sacrifice is found in the Drylands, far to the east. It is guarded by gargoyles, so use your usual tactics to defeat them, then free the shrine with the rune and take the moonstone with you. Finally, repair the moongate of Minoc with the moonstone, before you report your success to Lord British. This leaves only one mainland shrine to be freed.
Honor[edit]
For a map with labels, see: Paws – The Ultima 6 Project map.
For the last shrine, you want to go to Trinsic, the city of Honor. While you do so, you will travel through the town of Paws.
In Paws, you hear that there was some sort of tragedy recently. Even though the victims were not well liked in the community, gargoyle involvement is still suspected. So, go to the burnt-out house in the south of paws yourself, but your companions will give some comments that maybe you should investigate later and be more concerned about the tracks that lead south. Also, talk to the tower guard that you meet at the southern guard tower. He will pretty much tell you that there is something bad going on south, and you will see it is true when you meet a roadblock further south, blocking entrance to the Fens of the Dead, with a guard saying that it is closed until further notice.
Since that does not sound good, go to the stone bridge a little further to the west of the Paws guard tower and then northwest into the forest. A guard will stop you and bring you to their leader, Baden. He will finally tell you what is going on. The gargoyles have laid siege to Trinsic, meaning that right now no one can enter or leave the city, making your quest impossible for the time being. However, he already has a plan to break the siege, which involves using the moongate of the city. Go back to the castle to tell Geoffrey about it, and then return to Baden. You need to get into the city to tell everyone about the plan and get the means to repair the Trinsic moongate. Baden will make you invisible at night and tells you to find a rope to climb the walls.
Now go south and turn off the scripts of your party. You need to be peaceful. Once you reach the southern end of the swamp, you see the siege. The gargoyles will raise the alarm if they notice you, so it is now a game of finding a way to get by to reach the wall. You will find the hanging rope at the northeastern corner. Use it to get into the city (if you are discovered, it will not be there). The best approach can be to cut south along the western edge of the Fens of the Dead until encountering the gargoyles. Then head west before they notice you. After that, you should head south between the two gargoyle patrols to the Trinsic gate. From there, hug the northern wall until you reach the northeast corner.
For a map with labels, see: Trinsic – The Ultima 6 Project map.
Finally, on the walls of the city, start talking to everyone you finds. Tell them about the plan. On the way, you will meet the mayor, Whitsaber. Explain the plan to him and he tells you to tell everyone else so that they can be ready. He also tells you the mantra "SUMM", and that the rune is resting on a pedestal in the middle of the city. So take the rune right away. Your main problem for the time being is to alert everyone of the plan. The problem with that is, that some people are sleeping, meaning you have to wait for them to wake up. In addition, there are people in the basement of the guard tower in the southeast who need to be told as well. After everyone knows, return to Whitsaber (he tells you if you forgot someone), then exit the city using the Orb of the Moons, and return to Baden.
Baden now tells you that they will attack as soon as the moongate of the city is back in working order. Since you do not want to meet the siege force, go along the western coast of the mainland to get to the Shrine of Honor. The gargoyles guarding it need to be defeated. Then free the shrine and take the moonstone. After that is done, now comes the difficult part, getting to the Trinsic moongate. The safest way is, to drink Invisibility potions and then quickly go through the lake north of the gate. You will be discovered, but only by a few gargoyles, so kill them after running through the lake. Now, before you do anything, you should lure a number of gargoyles from the elevated path east of the gate to make the counterattack easier. Once that is done, arm yourself and repair the moongate with the moonstone. Things quickly turn into a full-out battle. Use your bows to kill the winged gargoyles first, since they are more dangerous than the wingless ones. If all went according to plan, the gargoyles should be defeated and Baden thanks you for your help.
Now, take the loot from the battle and sell it, before returning to Paws. Shamino now discovers that the death of the family was just an accident. Finally return to Lord British and report the freeing of the final mainland shrine.
Valor[edit]
For a map with labels, see: Jhelom – The Ultima 6 Project map
Now that you cleared all the mainland shrines, Arty can finally sell you a ship. So buy it, and set sail for the remaining shrines. Your first destination should be Jhelom, the city of Valor. You will have to bring Sherry the Mouse with you before departing for Jhelom because she is required for retrieving the rune of Valor. You can find her in Lord British's Castle, and she will gladly join if given cheese. You can find cheese around the castle, or purchase it from Ubermon in Paws if you ate it all. Be careful, she is very weak.
Once there, go to the mayor Zellivan and ask for the rune and mantra. However, he has neither of them. The rune was supposed to be in possession by Nomaan but a rat stole it, and he has no idea of the mantra. Just listen to the songs of the bard Culham at the Sword and Keg to learn that it is "RA". When that this is done, you need to know how to get the rune. Nomaan and Jerris (while in the tavern) can give you additional information about the rat hole in which the rune has vanished into, while the serving girl Lyssandra gives you the important clue that Sherry could get the rune out of the hole. Now that you know what to do, have Sherry enter the rat hole in the far northern corner of the tavern behind the harpsichord. Take the rune.
At this point, you might want to tell Sherry to return to Lord British's castle because she is very weak. You now want to leave Jhelom and sail to the small island directly to the southeast. There lies the Shrine of Valor. Defeat the gargoyle hordes, and use the rune to acquire the moonstone. Sail back to Jhelom, and use the moonstone on the moongate there.
Honesty[edit]
For a map with labels, see: Moonglow – The Ultima 6 Project map
Now, return to your ship and set sail for Moonglow, the city of Honesty.
After your arrival, go to the town hall and talk with the mayor, Aganar. He tells you that the rune is held by Beyvin, the husband of Penumbra. However, he has no idea of the mantra. Go the house of Penumbra, and after getting through some magical fields, get the bad news that Beyvin is dead. Killed in a bar fight for being too honest. Penumbra explains that the rune was buried together with him in the tombs. Some donations will make her reveal the mantra "AHM" to you. That still leaves you to find the rune. Talk to Beyvin's cousin Manrel and promise him to put some flowers to his grave to get the crypt key.
The entrance to the crypts is in a floor panel in the tavern, behind the counter. Just look for it. Now, the crypts are a dangerous place, but with a little preparation easy to manage. It has no secret doors. The first level is a big circle, which you should completely empty of loot, while being harassed by undead and slimes. On the second level, you have to defeat numerous evil fighters, a large group of slimes and acid slugs. Best use the powder keg trick to get rid of them, and then place the flowers at the grave there to get the stairs to the third level. There, search the graves until you have the rune.
For a more detailed solution, see Solution for the crypts.
Now, backtrack back to Moonglow and return the crypt key to Manrel, before you board your ship to Dagger Isle. Kill the gargoyles guarding the Shrine of Honesty, then free it and take the moonstone. Return to Moonglow and repair the moongate before going to Lord British to report.
Humility[edit]
For a map with labels, see: New Magincia – The Ultima 6 Project map.
Setting sail for New Magincia, the city of Humility, you finally only have one more shrine left to be freed.
Arriving at the docks, you should go straight to the town hall to speak with mayor Antonio about the rune and the mantra. The mayor will only give the rune to you after telling him the name of the most humble person living in New Magincia. As for the mantra, he says you should ask around. After you have spoken to the others, talk to Conor at the southern docks who insists that he is 'not the most humble person. He also knows the mantra, "LUM". Go back to Antonio and tell him that Conor is the most humble one in order to get the rune as well.
Set sail for the Isle of the Avatar, where the Shrine of Humility is located on the northern side. This island is a dangerous place, so go directly to the shrine and kill off the gargoyles, then free the shrine with the rune and take the moonstone. After that is done, sail back to New Magincia, and repair the moongate with the moonstone.
Finally, report to Lord British, that now all eight shrines of virtue are again in Britannian hands and all the moongates repaired.
The Silver Tablet[edit]
For a map with labels, see: Buccaneer’s Den – The Ultima 6 Project map
Now that you have solved the problem with the shrines and forced the gargoyles out of Britannia, it is time to see what the strange book that you got from the gargoyles is about. Go to the Lycaeum and talk to Mariah. She instantly recognizes it as a script she has already seen, but sadly, her translation tablet was damaged during delivery to her, so she only has a fourth of it and needs the rest before she can make something of it. Take the fragment of the Silver Tablet from her room, and then set out to find the gypsies under Zoltan, who had brought it to her in the first place. Use the Gypsy calendar to find out where to find Zoltan and talk to him. As it turns out, Captain Johne wanted him to get the tablet to Mariah some years ago, but the pirates under Captain Hawkins ambushed him and the tablet broke in two. The only way to get the other half is to find these pirates.
Since Buccaneer's Den is the obvious choice for pirates, go there and ask around. Homer is the man you want, and he says right away that his crew had murdered Hawkins, but he won't reveal more until you are a member of the Guild of Thieves and sends you to Budo, the guild master. Budo in turn wants the thief Phoenix cast out of the guild before he allows you to join, by your stealing her membership belt, adding that she has made her home in the sewers under Britain. Return to Britain and enter the sewers through the castle.
For a detailed solution to the sewers, see Solution for the sewers.
If you have followed everything, you have found Phoenix, who is quite talkative but will not give the belt on her own. So, use the spell Pickpocket to get it from her. Now you have the choice to either orb out or use your ship again, or to further adventure in the sewers and then through the Buccaneer's Cave, which leads onto the island. If you do so, first invade the pirate fort in the lake near Phoenix’s home to get amounts of loot, before following the Solution for the Buccaneer’s Cave to return to the surface.
One way or another, you finally show Budo your belt and gain membership. Now, Homer is perfectly willing to talk to you, and explains that after murdering Hawkins, the pirates buried the treasure and ripped the map into nine pieces. Homer has one and knows the details, but will not give any of this until you show him the other pieces. However, he only remembers five of the pirates – of which four have a map piece – and he cannot help you further for the time being until you have all of the pieces.
Map Pieces and the Treasure[edit]
Your next course of action is clear, you need this map in order to get the silver tablet.
Since it would be pointless to look for the pieces before you know where to find them, go to Trinsic first and talk to Sandy, who was the cook on Hawkins' ship, but does not have piece of the map of his own. Sandy actually is willing to trade the information, as long as you get him a fresh dragon egg from the dungeon Destard. He will not take any others, since these are rotten and unusable. Destard is west of Trinsic, and infested with dragons, giving you a real challenge. Alternatively you can get a dragon egg from the White Wyrm underneath the volcano at 84S and 112E next to the Isle of the Avatar (need to break the rocks blocking the entrance first).
For a detailed solution how to solve this mess, see Solution for Destard.
Once you have finally gotten the egg that Sandy wants from Destard, return to him and make the exchange. Of course, Sandy tries to weasel out of telling the last name, Alastor Gordon who actually is the mayor of Trinsic. In the end, you get all eight of the names, and are now ready to take on finding these pirates and their map pieces.
The first one is really easy, since you already are in Trinsic. Just remind the mayor Lord Whitsaber of his past as Alastor Gordon under Captain Hawkins, and promise to keep things quit in exchange for the map piece and he gives it to you on his own.
The second one is the pirate Bonn who has shipwrecked on Dagger Isle years ago and became a hermit. Approaching him, Bonn himself mentions concerning the map, that it is in his basement, his "future grave". That is enough of a hint to search the basement of his house, where you find an illusionary wall and walk directly through it, to find the map piece in a chest behind it.
The third pirate is the unnamed pirate, who has died in a shipwreck at the Cape of Heroes. So search the islands of the cape with your ship until you see the wreck. Now, there first is the issue of the undead crew, but once that is settled, you can easily find the map piece in a chest in the wreck.
The fourth pirate is Nathaniel Moorehead, but once you reach Empath Abbey, his wife Sylaina tells you he already is dead and the map piece got stolen by the gypsies under the thief Arturos. So use the Gypsy calendar to find out where they currently are and talk to Arturos. You can either pay his price of 100 gold pieces, or refuse once to get it down to 50. One way or another, you have the map piece.
The fifth map piece is held by Morchella, who lives on the Isle of Deeds. She will only release it for a special shield from the Order of the Silver Serpent. So first talk to Koranada in Serpent's Hold, who easily allows you entrance. Take a curved heater, a gold nugget and a peering gem to Gherick, so that you get the special shield, then be present in the order tower to get initiated. Afterwards, trade the shield with Morchella to get the map piece.
These were the easy ones. The final three pieces are far more difficult to get.
The sixth piece was held by Heftimus McPry, who has become a beggar in Jhelom and says that rats stole it from him in dungeon Wrong. That means you have to enter the dungeon to get it back from them. Now, Wrong is connected to dungeon Covetous and this will be a really complicated and dangerous trip, so read Solution for Wrong and Covetous to solve the problem and get a hold of the map piece.
The seventh piece is not much easier, since the pirate Old Ybarra is lost in dungeon Shame. So go to Lost Lake, enter dungeon Shame and then follow the Solution for Shame to navigate your way through the dungeon. Since you already have found the wishing well (it conjures food), talking to Old Ybarra, you first exchange food for the map piece since he is half starved to death and then explain the well, so that he is saved.
The eighth piece was held by Ol' Hawknose, but as Sin Vraal in the Drylands tells you, the pirate got killed by giant ants when he tried to kill the gargoyle and his body got dragged into the ant mound. This really is the hardest map piece to get, so refer the Solution for the ant mound to solve this mess and find the map piece on Ol' Hawknose's dead body.
Now that you finally have the eight pieces of the map, return to Homer and promise him to get the storm cloak from Captain Hawkin's treasure for him, so that he in return gives you the last piece together with instructions how to find the entrance. You should have several powder kegs in your inventory and purchase a shovel from Budo, before setting sail for Spektran. Follow Homer's instructions and use your shovel to free the entrance to enter the Pirate Cave.
Now, the Pirate Cave is a very dangerous and also very complicated place, follow the Solution for Pirate Cave until you have reached the treasure chamber. Once you are there, pile up three powder kegs in front of the entrance door and blow them up to gain entrance. Feel free to get all of the loot. Important are the storm cloak for Homer, the magic fan from Utomo and of course the second piece of the silver tablet. The back wall of the room is not real and is a fast way back to the surface.
So follow the path and you emerge at the island Pirate's Den. After getting rid of the pirates, plunder it as well and get the deed for their ship, before using it to return to Spektran to get your own ship, which is still docking there. Since you are honest, bring the storm cloak to Homer, who will thank you for it.
The False Prophet[edit]
For a map of the main Gargoyle city, see: Realm of the Gargoyles – Ultima 6 Project map
For a map of the main agricultural lands, see: Manide Don – Ultima 6 Project map
For a map of the Birth of Passion, see: Inzende Or – Ultima 6 Project map
Now that you finally have the completed silver tablet, bring both pieces and the gargoyle book again to Mariah at the Lycaeum, whom now can translate you the whole thing without much problem. It holds quite the nasty surprise in that the gargoyles think that you are the villain in the whole thing, thinking that you are the False Prophet, who will bring doom to their race. It also states that only a "sacrifice" of the False Prophet will bring peace. Mariah does not like this at all, and suggests you should go to Sin'Vraal in the Drylands and see what he thinks about the whole thing. So orb to the Shrine of Sacrifice and walk to his hut to speak with the gargoyle.
Sin'Vraal explains, that sacrifice can mean many things, and since he had been an outcast in gargoyle society, he would not know all of them, thus the need to talk to a gargoyle scholar to get more information. Sin'Vraal explains further, that you will probably need to visit the Shrine of Singularity, but that this is impossible without flying, which you obviously cannot. That is a problem for later however. He also mentions that Captain Johne should know more, and that the entrance to the Realm of the Gargoyles and the house of the captain are at the bottom of the dungeon Hythloth, which is located on the Isle of the Avatar.
Now, orb to the Shrine of Humility and walk the eastern coast until you reach Hythloth (only possible in newest 1.1). Hythloth is the biggest and meanest of the dungeons, so pray that you come out of it alive. Also use the Solution for Hythloth to make it even possible.
One way or another, once you have found Captain Johne's house, talk extensively to him and he gives you much enlightenment about the whole mess and begs you to help the gargoyles, before their whole world is destroyed by the void. He suggests meeting his friend Beh Lem at the nearby gargoyle exit of Hythloth and then gives you a Gargish-English dictionary. Read that one completely, down to the last page. That will enable you to finally understand the gargoyles, then proceed to the exit to meet Beh Lem. If he is not there, explore the island a bit and then wait at the entrance until he arrives at the appointed time. Beh Lem in turn pretty much tells you that his father Valkadesh could shed light into the whole sacrifice mess, and then joins you permanently (you need him, or the gargoyles will attack you).
Now, enter the teleporter to the main island, then find the path into the gargoyle city. Stay far away from the gargoyles for now and instead seek out Valkadesh's house in the southwest of the city. Valkadesh gives you more information, and that there possibly are ways to prevent the prophecy, but warns you that you better first surrender to Lord Draxinusom so that the other gargoyles no longer see you as a threat. Go to the house of Draxinusom and say Valkadesh sent you, then agree to his conditions without complaint, and he puts the Amulet of Submission onto you, which you should keep on, as it shows you have surrendered to the seemingly inevitable. Return to Valkadesh, and he tells you that you will have more than enough time now, since the next possible date for a sacrifice is far away. Since you without doubt want to prevent being stabbed to death, he sends you to Naxatilor, to finally to know more of the prophecy.
Naxatilor says there are three meanings to sacrifice – self, others, and valuables. Since sacrificing yourself is what you have been trying to avoid, and you certainly do not want to sacrifice your friends, you must sacrifice that which is valuable. The only thing of value to the Gargoyles is the Codex of Ultimate Wisdom, and Naxatilor will ask if you mean destroying the Codex. Answer no, leaving only one alternative – return the Codex to the Vortex. Therefore, that is what you have to do. Therefore, Naxatilor sends you to the Hall of Knowledge to read the Book of Rituals so that you know what to do. In addition, take the broken purple lens and get it repaired by the Lensmaker, then go back to Naxatilor, who says you need a human lens as well. In addition, you need the Vortex Cube and access to the Codex. Alas, Captain Bolesh will tell you, while he is recovering at the healer. The only way to gain entrance is to get a quest from the Shrine of Singularity.
The Balloon[edit]
The flying issue is a real problem, so you need to find a way to fly. Since your orb has by now programmed the center of gargoyle city into it, return to Britannia with the orb, then board your ship and go to Buccaneer's Den. Once you are there, listen to the song of Johann, who mentions a balloon. Since that needs more information, go to the Lycaeum and search the library until you have found the book "The Lost Art of Ballooning", and read it thoroughly. There is a rumor that a balloonist is in Minoc. So orb to Minoc and first ask mayor Isabella and then Selganor, who tells you that the balloonist was hired by Sutek the mad mage, who lives on the island of Terfin, which will be your next stop.
Once you have docked there, prepare to fight a number of bizarre creatures including mutant fish, mutant boars, two-headed alligators, giant rabbits, and giant chickens. Blackthorn’s former palace is now a huge labyrinth, and Sutek tells you the balloonist is dead in his dungeon. The castle is a maze of doors hidden behind curtains and doors that look like the walls. It will require patience and persistence. To get through this labyrinth, first explore the southeast corner on ground level. There you can find a key. This key unlocks the main door to Sutek's castle, and you can enter his throne room by unlocking doors by the entry sign. From there, enter the northeast tower and head to the roof. Fight the monsters on the roof, and grab the silver key from the hedges. Proceed down one level on the northeast tower. Unlock the doors there, and enter the room to the right into a torture room. Grab the pewter key from the far corner of this room. Go back to the ground floor. To the northeast of Sutek's throne room is another room which has a door leading west. This room has farm animals in it and is directly north of the throne room. This will lead you to the northwest tower. From here you can access more of the castle and search for a magically locked chest with the gold key. You will eventually make your way to the southeast tower. From there, go down one floor, and then head to the basement through the southwest tower. Talk to Pushme Pullyu. Unlock the central dungeon to speak to Gorn, and grab the copper key while you are there. That allows you to unlock the door in the southwest on ground level. The answer to the Pushme Pullyu is to take the eastern trapdoor. Head down there and proceed through some lava. Explore down there for the steps to produce a balloon.
Therefore, you need to build a balloon. Here what you need to do:
- Cauldron: You can find several in dungeon Wrong, or the Cyclops Cave, but one is enough.
- Anchor: You can buy it from Budo. You must separately attach a rope to the anchor for this to work. Place both on the same character, and use the rope.
- Rope: Mortude in Paws sells rope. Buy six rolls from him.
- Basket: Michelle in Minoc can make that one for you if you have the plans.
- Balloon Hull: Have Arbeth in Paws make 40 spider silk into thread, then try Thindle for weaving, but he cannot. Instead go to Charlotte in New Magincia, who can. Then bring the silk cloth to Marissa in Paws to let her make the bag according to the plans.
Finally, return to the gargoyle lands and go to the clearing beneath the Shrine of Singularity. Using the clearing repeatedly will enable you to build the balloon, until it is ready. Then board it and fly up to the shrine. Once there, use an extra rope to secure the way back down (you can now use the rope to get up there). Finally, you have arrived at the Shrine of Singularity.
The Sacred Quest[edit]
Once you talk to the shine, are direct and say you are on a sacred quest and that you want everyone to have the Codex. The Shrine of course says it is not that easy, since you first should learn more about the gargoyles and directs you to discover the mantra of singularity by meditating at the shrines of three principles.
- Control
You will find the teleporter to the Shrine of Control in the mountains south of Valkadesh's house, high up where the snow is falling. The teleporter, after you found it will you transport you into a huge ice cavern. The first part of the level is not particularly difficult; you just need to manage your way to the other side of the cavern, where a walkway leads to the lake in which the shrine island lies. There are Elder Wyrm Dragons, but by now, you should know how to deal with them. The big puzzle is the shrine island, since an invisible labyrinth surrounds the shrine. The trick is to go around it on the left side, and take the back entrance to reach the shrine.
For a map with labels, see: Shrine of Control – The Ultima 6 Project map.
The shrine surprisingly is Mondain, who got into this form to show that his insane idea to control the land had cost his own self-control. After he has taught you all he can, he reveals the first part of the mantra of Singularity. Now make your way back out.
- Passion
For the Shrine of Passion, take the teleporter to the jungle island. There is not much to see on it, just leave the jungle and make your way to the ruins, where you find the teleporter to the shrine area. The shrine area is perhaps the most dangerous place to be found, as not only is it swarming with enemies (dragon, daemons and fire lizards), but you are also constantly taking heat damage. You need to take the left path, constantly heal yourself, enter safe zones, until you have reached the other side of the cavern, cross the lava river, and then descend the steps into the lava lake itself! Now, quickly make your way to the shrine island and deal with the foes there, while continuing to heal yourself and find the one place you can break to enter the shrine.
For a map with labels, see: Shrine of Passion – The Ultima 6 Project map.
The shrine this time is Minax, who gives you a tale how boundless passion was her downfall, before she gives you the second part of the mantra. Orb out directly.
- Diligence
The Shrine of Diligence is difficult to find. You must take the teleporter to the farming island and then start to search the snowy area of the mountains near the farm of Farmer Nash in order to find the teleporter hidden away in a cave. Now, the shrine area is a big puzzle. Figure out which part between platforms are invisible bridges and where really is a gap. This is more difficult through the masses of corpsers. Your first goal is to reach the path in the side wall, then proceed to the other side of the cavern, where you need to find the path to the middle, which is just a test of endurance.
For a map with labels, see: Shrine of Diligence – The Ultima 6 Project map
The last shrine is represented by Exodus. He recounts that he was very diligent in his goal, so much that he went too far and lost sight of what he wanted. He then gives the last part of the mantra.
Now that you do have all three parts, return to the Shrine of Singularity, and upon the question, say the Mantra "UnOrUs", so that you finally gain the needed Sacred Quest.
Restoring the Peace[edit]
You are almost done, but some things remain.
First off, we need the human lens. Orb to Moonglow and go the Lycaeum in order to speak with the astronomer Ephemerides for a human lens. He will require a glass sword for it, so if you do not have one, bring peer gems to Dale in Minoc to get one. Ephemerides in return will give you back the gargoyle lens and the blue human lens. That was nice and easy. Now the only thing missing is the Vortex Cube. It was told by the curator of the Hall of Knowledge has be stolen and brought to Stonegate.
Arriving at Stonegate, you notice a cyclops family has made it their home. Just be friendly and talk to Papa Cyclops and he agrees to give you a key in return for fresh fish. Get his fishing rod and get some fresh fish from the nearby sea, then give it to him to get the key. You must have the fishing rod equipped to your main character. Right click a fish swimming in the sea by the small beach south of Stonegate. That done, enter the basement and try to navigate your way through this mess, until you have reached the bottom, where you bash through some boxes and unlock the only door and get the Vortex Cube. You can now orb out and directly to the Shrine of the Codex.
Since you do have a sacred quest, the Stone Guardians allow you to pass. You now should have the eight moonstones, the Vortex Cube and both lenses in your inventory. So read the Codex of Ultimate Wisdom, and then return it to the void, to bring peace to the land.
Side-Quests[edit]
These side-quests are not sorted by city, but by region of Britannia in which they start. Note: However, once a quest has started, it can well get you to travel all over Britannia. Some of these quests span multiple entries in the Compendium.
Central Britannia[edit]
- The Wizard of Oz
Fyodor in Britain tells you that Lord British would really like to have the book Wizard of Oz, so go to the Lycaeum and search the library until you have found the book. Bring it to Lord British and he will reward you with numerous peer gems, easily worth the thousand gold pieces.
- Quest for the Jester
Chuckles in the castle tells you after some talking back and forth that he has left a trail of hints of something important. First search Nystul’s chest to get that. The next clue is in Serpent's Hold. Once there, search the potted plants until you have the clue, then the next one is under a beehive in Michelle's shop in Minoc. That clue in turn tells you the next one is in the harpsichord of the tavern in Moonglow. That one then tells you that the next clue is hidden in a jail cell in Yew. This will tell you that the next is in the cauldron of Charlotte in New Magincia. Moreover, that one leads you to the final clue, which is hidden in one of the lions in the courtyard of Lord British's castle.
That last clue finally tells you to talk to Smith the Horse at Iolo’s hut. He gives you a clue to the previous game.
- Mystery of the Silverleaf
Maldric in Castle Britannia boasts that a secret ingredient makes his roasted boar so great, but he does not tell you what it is. Players of Ultima VII already have a good guess. Buy several jars of honey from Empath abbey, then go to the silverleaf trees north of Serpent's Spine, where you meet the Fuzzies Flizzbomb, Haplin, Porshon and Empley. Now, it will take time, bribery with honey, and finding out when to speak with them, but eventually, they will task you with finding silver tree saplings, which you can find in the southern Spiritwood.
Take all saplings with you and present them to the Fuzzies to get several Silverleaf in return. Show these to Maldric, and he admits that this is his secret ingredient and tells you the exact recipe.
- The Spider Cave
Lady Nan in the conservatory is scared of spiders, and even tells you about the Spider Cave. So go to this cave, which is found in the mountains a little south of Empath Abbey. Besides lots of spider silk, you should kill the Spider Queen. Once that is done, return to Nan and give her the news, so that she can sleep better at night in the future.
- Healing the Deaf
As Anya in Britain tells you, her husband Matt is suffering from his deafness, especially since their daughter is studying music at the Conservatory. Therefore, she asks you to find a way to restore him. Sail to Marsor's Isle (north of New Magincia). Here resides the dark mage Lorcan. Search the pile of bodies behind his house to find a spell against deafness. Return to Anya, and give her the good news. Then heal Matt and then talk to Anya again.
- Freitag
Kytyn at the royal museum tells you about the soldier Gertan and his battle with the dragon Freitag. You can meet Gertan in Cove as one of the wounded. He mentions that Dr. Cat would love to hear the story as well, even if only in book form. So, go to the Lycaeum and find the book Caverns of Freitag. Bring that to Dr. Cat in Paws.
- Bard Secrets
Kenneth in the conservatory in Britain tells you that Bards have many secrets, but does not want to tell all of it at once. You have to return to him regularly in order to slowly weasel everything out of him. Everything he tells you is surprisingly helpful advice.
- The Depths of Despise
Entering the adventurers’ guild in Britain and talking to the guild mistress Hermione. She reveals that Adan, who is one of their men, went into dungeon Despise but never returned. She wants the map from him, regardless if he is dead or alive, and tells of two more people having a stake in this. First, talk to Terri, who was expecting a delivery of gold from Adan and fears the worst. (note that once you do this, you will not be able to exchange gold with Terri until after you finish this quest) Then speak to Efram, who is Adan's friend. So go to Despise and follow the Solution for Despise.
Once you have found Adan's body, take his book and other stuff, and read it thoroughly. Also, take all the gold bars you find in a crate near the entrance and on Adan's body. Return to Britain. First show Hermione the book, then give the gold to Terri (she only takes 30 bars), and then give Efram the book. Then finally return to Hermione.
- Funeral for a Warrior
Talking to nurse Sasha in Cove about her other patients and especially Ed, she declares that Ed has died from his wounds. Well, take his body to Geoffrey, who instructs you to go to the mortician at Empath Abbey for funeral preparations. He cremates Ed's body and gives you the urn. Return to Geoffrey, and then go to the cemetery of Britain to attend the funeral. Afterwards return to Geoffrey a final time.
- The Healing of Artegal
Talking to Lazeena in the Blue boar reveals that she knows Artegal, one of the wounded in Cove. After you have talked to Sasha about the wounded man, reveal his location to Lazeena. Escort her to Cove, where she will tend to Artegal as well. Come back regularly every 7 days to hear from Sasha about Artegal's slow improvement until he is released. Be careful not to visit too often, as each visit can sometimes reset the 7-day counter.
- The Triple-Crossbow
Gwenneth at Iolo's Bows reveals that they can make an ultra-strong triple crossbow, but it will take three months. This starts a timer, and after the three months have elapsed, you can actually take the weapon into your inventory when you ask for it.
Northern Britannia[edit]
- True Justice
After you got the rune from Witton, listen to his story about Lenora. Next you have to talk to the prisoners Essian, Strom, and especially Taliesin, the male druid. Finally, talk to Riona again, before you talk to Lenora a final time. She finally understands that in her grief over her predecessor, she had lost sight of true justice, and frees the wrongfully imprisoned people (you can visit all affected people to get responses). Go to her for confirmation.
- Gargoyles in Yew?
In Yew, you are confronted with burnt-down houses and accounts of gargoyles being the ones responsible, with rumors about the shrine. So go to the Shrine of Justice (better after you cleared it) and investigate. In the woods nearby you find four items: a strange triangle, bloody slippers, a bloody knife, and another strange item. Since the whole thing seems suspicious, it calls for further investigation.
Talking to Sylaina in Empath Abbey, she mentions her late husband's strange friends, Dagan, Bast and Sy, who seemed to have become a militia group. They camp either at the shore of Lost River or near the shrine) and question them. Search the area near their southern camp to find stairs inside a big tree trunk that leads to a cave. The journal there is enlightening, in that the so-called militia is the true culprits, who have created false evidence. Take the journal, all three of the cloaks and masks and then search outside for the grave of their latest victim (you notice it by the shovel). Take the shovel on it.
Now, present the journal to Lenora, then the three masks and cloaks, mention the grave, and finally hand over the fake evidence. They are now behind bars.
- The Grave Digger and the Mortician
At Empath Abbey, there is a feud between the mortician Glen and the gravedigger Mole going on, with none of them speaking to the other. So start with Glen, then go to Mole. That way you exchange messages between them until finally, the situation is mostly resolved and you get a key from Glen. Open the chest in his house for your reward, and also take the special shovel and give it to Mole, so that he is satisfied as well.
- Utomo and Yuna
Utomo in Yew misses his love Yuna. You do find her in Buccaneer's Den and give her the news. Return her message to Utomo and he tells you some things about the magic fans.
Eastern Britannia[edit]
- Mandrake for Doris
Doris, who is running the inn in Minoc gives you a small task: getting her some mandrake root for her studies of magic. It actually does not have to be fresh, just some from your reagent pool satisfies her, and she gives you a rather meager reward.
- For the Boat
Grindl in Minoc has need of some rope and sailcloth. You can either find these things, or buy them in Paws and then deliver them to her. She will reward you for the delivery.
- The LAIM Scroll
Using a ship to reach the shore directly north of Minoc, which cannot be reached by foot, you find the entrance to an icy cave directly below the old water tower. After killing the monsters inside, break the icy wall to the next room with an arrow and meet the mages Mr. Blip and Miss Blip. These two have a problem, they suffer of the LAIM disease and need a cure, but the only scroll was stolen by thieves. In addition, a rare ingredient from a big serpent is needed. You need to get both.
The scroll is found on the fourth floor of dungeon Shame, in a secret room next to the food-wishing fountain (search carefully for the entrance) and the ingredient is silver serpent venom, found either near the Shrine of Honesty or in the Realm of the Gargoyles. Bring both back to her.
Western Britannia[edit]
- The Murder Mystery of Quenton
After you got informed by the mayor, received the rune, ask Marney about Quenton. She voices her doubt about the circumstances of his death, wishing you to investigate the matter. Therefore, we do so. To get results you have to talk with everyone in town, especially the innkeeper to get his ghost story, and even Horance for some cryptic hints. Once you have literally pressed them dry and gotten all the hints (sometime you have to talk to someone again after new information), use the Seance spell to talk with the ghost of Quenton (who haunts the inn at night) as well for further hints. You also notice Michael coming into town in the evening, and since you know who he is from Marney, talk to him and watch him act suspicious. You can by now using the hints that he is the true culprit.
Now that you know all this, talk to the mayor's brother at the drawbridge to Castle Britannia, he is the gate guard, and get confirmation that although the whole thing is suspicious, his brother would not reopen the case. So return to Marney and tell her that you suspect Michael. She tells you while shaken to give the case to the druids. Go to Yew and talk to Lenora about the matter. When you return to Marney, she tells you that they arrested Michael.
You can later visit him in the Yew jail.
Southern Britannia[edit]
- Flippits
Dr. Cat tells you, that Thindle and Mortude are really passionate flippits players. They will reveal that you need three things: a hat with a brim, a bone and a dry pea. Curiously enough, these things are hard to get. Once you do have found them over the course of the adventure, play a round with Mortude, and if you win, you will gave 1-point dexterity. The odds of winning are random, so keep playing.
- A Book for Dr. Cat
As Dr. Cat will tell you, he is looking for a copy of the book Snilwit’s Big Book of Boardgame Strategy in order to broaden his horizons about games. So, go to the Lycaeum, search the library for the book, and bring it back to him. Dr. Cat gives you a 500 gold reward for the book.
- Jimmy's Ship
Jimmy in Trinsic tells you during the siege that his ship has been damaged by the gargoyles. Once the siege is broken, he asks for your help in the repairs, saying that Strom in Yew should know how to do it. You actually need to have freed him from prison first by making Lenora aware of her error of ways, before he can help you at all. Once you have done so, Strom explains exactly everything, and that you need five planks in order to do so.
In order to get the planks, first visit Ben the lumberjack and get five Yew logs from him. Then visit the sawmill in Minoc to get five planks made from the logs by Aaron. With the planks, return to Trinsic and speak to Jimmy while he is at the docks, and together you can repair the ship. Jimmy repays you for your help with ten of each reagent.
- The Hooded Stranger
Talking to Abelinda in Trinsic during or after the siege reveals, that a hooded stranger has talked to mayor Whitsaber. The mayor however says it was a misunderstanding, and that the stranger went to Serpent's Hold. There, Lady Tessa says he got in a confrontation and left. Sir Simon reveals he is looking for pirates. Budo in Buccaneer's Den says the stranger went on to the Lycaeum. Mariah then reveals that the stranger was interested in the silver tablet.
Since by now you can guess that it was a gargoyle, go to Sin'Vraal to solve the matter and return to Mariah to give her the answer. If you have also reunited the two halves of the silver tablet, Mariah will then be willing to join the party.
- Gypsy Resemblance
First talk to Taynith with Zoltan's gypsies (consult the gypsy calendar), and then talk to Penumbra in Moonglw. Penumbra will mention that she does not know her parentage. Ask Anya at the Blue Boar in Britain about the resemblance between Penumbra and Karina, and she will mention that Taynith visits Dr. Cat. Visit Taynith about her resemblance to Penumbra and Karina, and she will be tight-lipped. Now, go to Paws and talk to Dr. Cat. He will say that you need to talk to Taynith when she is at his establishment. Wait until Zoltan's band of gypsies visit Paws, and then wait around until Taynith visits Dr. Cat. Talk to Dr. Cat while Taynith is there, and then talk to Taynith to find out why she looks so similar to Penumbra and Karina.
Islands of Britannia[edit]
- The Wisps and Level Eight
Talking to Xiao at the Lycaeum, she tells you outright you need to do something special to get level 8 spells from her. She wants you to ask the wisps for their secret. While you are there, also go to the library and take The Book of Lost Mantras with you. Now, go to Spiritwood and talk to a wisp. The secret is easy, it is the Armageddon spell. Transcribe it into your spellbook, but never cast it. The wisps also want dense information, so give them the book, and in return demand the gold.
Now you are much richer after exchanging it at the mint. Of course, Xiao will only accept that you have done it when you have reached level 8, rewarding you with +1 intelligence and access to her spells.
- Sir Cabirus and his Vision
At Serpent's Hold, you meet Sir Cabirus, of whom you have heard from Almric in Castle Britannia. His has a vision of building a colony in the Abyss. Listen to it for him to mention two interesting groups, the Seers of the Moonstone and the Knights of the Crux Ansata.
First the seers. Ask mayor Aganar of Moonglow first, then talk to Dargoth at the Lycaeum. He would be willing to let you join, if you manage to secure a very nasty spell for them: Anju Sermani. A fighter at Serpent's Hold should have already mentioned it. Since it is so evil, go to Marsor's Isle, the island of the dark mage Lorcan, search his books (read them all to the end) until you have found the right one and the Anju Sermani scroll falls out. Return that to Dargoth and, you can join (and gain a special staff).
As for the knights, talk to mayor Zellivan in Jhelom, and he offers you to join if you manage to return a special shield to them from a knight that died in dungeon Destard. You will find the body of the knight in a cave on the second level, near the exit to the third level. Bring Zellivan the shield. Now you can join the order as well.
- Love in Moonglow
Reagent seller Joren in Moonglow tells you of his crush on the assistant of the clothier, Dulcie, but thinks he has no chance since she is in love with the clothier, Garridan. Talking to Garridan makes it clear he is not a good choice for her, but Dulcie thinks he is the perfect man and thinks of Joren as just cute. You need more hard facts to convince her. Search Garridan's house to find a book in which he accounts of relationships to five different women. Wait until the evening to catch him red-handed with one of them, but he does not seem to be concerned at all. So go to Dulcie and tell her now, then show the book as proof, which makes her run off to confront Garridan. Now go and talk to him.
Afterwards, go to Dulcie again, and she cannot believe she fell for this guy, but will need awhile before starting a new relationship. Go to Joren, who takes the news with great relief, and hopes something could develop in the future.
- Elad and Virtue
Elad on Buccaneer's Den is trying to be more virtuous. You should believe him, and give him the mantra he is seeking, so that he can meditate at the Shrine of Honesty.
- The Hat of Johne
In the middle of the treasures of the pirate fort in the caverns beneath the Britain sewers, you find Captain Johne's hat, with no hint how it got there. Just hold onto, it and return it to him once you meet him in dungeon Hythloth. He will be thankful for having it back.
- An Egg for the Chef
Shubin at Serpent's Hold want a dragon egg for a special meal, so give him one of your spares (you hopefully have took more than one from Destard) in order to satisfy his demand.
- The Young Sailor
Young Evie of New Magincia dreams of becoming a sailor like her mother, and hopes Conor Starfalcon will teach her how to sail. Talk to Conor, and he will tell the hero he thinks the girl is still young, and first needs William’s permission. Talk to William who thinks it is a great idea. Talk to Evie again. She is now excitedly preparing for her first sailing lesson.
- Strange Glow at Conor's House
Talk to the innkeeper about Connor, and he will tell you that there's a strange glow at Conor's house at night, and that he used to be a Guildmaster. Then go to Serpent's Hold and talk to Koranada, who tells you that Conor used to be a Guildmaster of the Order of the Silver Serpent. Go back to New Magincia and confront Conor about this, who tells you to visit him just after dawn. Visit him in the morning, and he will give you his old magic sword and magic shield.
- Fencing Lessons from Loubet
Not really, a quest, but training with Loubet of Serpent's Hold grants the Avatar +1 dexterity.
Multiple Locations[edit]
- Shipwrecks
There are three shipwrecks.
The first one is that of the ship Virtuous, of which the bard Sionnach at Empath Abbey tells you about. You will find the wreck at the northern shores of Lock Lake, but beware that you first have to take care of the undead crew before you can plunder it. Within is over a thousand gold, reagents, and some magical equipment.
The second is the ship Dutchman, of which the bard Lazeena in Britain sings about. It is wrecked on the Fens of the Dead. The undead crew guards it well.
The third and last is the ship "Empire" in the main quest, and its location is revealed by Homer.
- Zoltan's Earring
After Zoltan told you the story how of Captain Hawkins attacked them, he also reveals that the pirate stole his favorite earring. You can find it in the pirate treasure where you find the silver tablet, and return it to Zoltan. The gypsy will reward you with 10 gold, a glass sword, and 2 powerful magic scrolls.
- Greetings form the Militia
The southern militia group of Carra, Dax, Hob and Thonyn that patrols the Trinisc area feels they should give their greetings to the militia that patrols the Cove area (and which rescued you at the Temple of Virtues), consisting of Marcus, Razo, Oran and Wyburn. So exchange messages.
- Fortunes told
You can have your fortune told by Penumbra, Taynith, Arturos, and Wanda. This quest can never be completed, as it is just a collection of notes.
The Evil Path[edit]
There is an evil path that allows you pretty much to bring death and destruction to Britannia. The dark path is initiated by talking to the dark mage Lorcan on his island. However, he only talks to characters with low to zero karma. Lorcan will give you only one chance, if he meets a virtuous Avatar the first time, the path is automatically blocked. Lorcan explains to you that he has been extensively studying the long dead dark master Mondain, and believes his return is imminent, but has been unable to contact the spirit of the dead sorcerer. He sends you to the ruins of Magincia beneath New Magincia to find the book that describes a ritual to summon Mondain.
You can reach the ruins through the cellar beneath William’s home. His young grandson Fred has the key, but you might need to speak to Evie and William before he reveals that information.
Deep beneath New Magincia, you find the ruins of Old Magincia. Head to the far south, across a bridge and enter a small crypt. Search in the bookshelves for the book Evil Rites, which describes how to summon Mondain, Minax and Exodus.
You'll need:
- Bloodletting knife (Found in Lorcan's house)
- Empty Bottle (Found in Lorcan's house)
- Mondain Medallion (Found in level 4 Deceit) (Solution for Deceit)
- Enilno (Found in level 3 Hythloth)
- Cards of Exodus (Found in the Lycaeum, search the book titled Exodus Cards by the Avatar shrine, the cards fall out after reading to the end)
After you have gathered these five items, return to Old Magincia. In the center of the ruins is the Altar of Evil. It is surrounded by a number of pillars and corpses. Right-click on the altar and begin the ritual. Sacrifice Mondain's Medallion, the Cards of Exodus, and Enilno. The evil spirits will possess your companions, and Mondain will bring about the destruction of the Gargoyle lands and Lord British, leaving you the undisputed master of all Britannia.
The evil ending only requires you to free the five mainland shrines so you gain access to a boat. You also do not need to investigate the treasure of Captain Hawkins. If you wish to play both endings, it is best to play as a virtuous Avatar until you have gathered all the map pieces, all the items required for the summoning, and freed all eight shrines. After that, you can go to zero karma by murdering and pillaging across the land. All party members but Shamino, Dupre, and Iolo will leave you. You can then go and speak to Lorcan and start the quest, proceed directly to Old Magincia, and beat the game.
Important Information[edit]
- The Ultima 6 Project gypsy calendar
- The Ultima 6 Project militia groups
- The Ultima 6 Project Map Locations
- The Ultima 6 Project dungeon solutions
- The Ultima 6 Project equipment locations
- NPCs of The Ultima 6 Project
- The Ultima 6 Project Easter eggs
| Walkthroughs | |
|---|---|
| Game | Ultima I ☥ Ultima II ☥ Ultima III ☥ Ultima IV ☥ Ultima V ☥ Ultima VI Savage Empire ☥ Martian Dreams ☥ Ultima Underworld ☥ Ultima VII ☥ Ultima Underworld II Ultima VII Part Two ☥ Ultima VIII ☥ Ultima IX |
| Console | Ultima III (NES) ☥ Runes of Virtue ☥ Ultima VII (SNES) |
| Fan Games | Ultima IV Part 2 ☥ Ultima V: Lazarus ☥ The Ultima 6 Project ☥ Ultima: The Dark Core |
