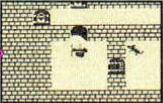
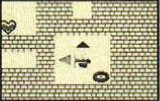
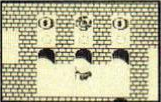
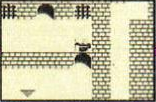
Runes of Virtue walkthrough
Ultima: Runes of Virtue (1991)
Game Background[edit]
"Through the mystic moongate you have been transported to the land of Britannia, where a world of magic and adventure awaits you. Ruling over the lands he united, Lord British guides his people as they seek to master the eight virtues of the Avatar. It is your quest to recover the runes, symbols of these great virtues by the Black Knight."
Game Mechanisms[edit]
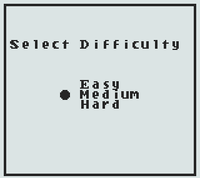
Difficulty Levels[edit]
You can choose from three difficulties.
- Easy
When you're defeated, you're restored at the start of the level.
- Medium
When you're defeated, you're returning to the surface at the entrance to the cavern you were in.
- Hard
Just like Medium, BUT you also lose ALL your gold, food and potions!
Two Player Game[edit]
If you connect two Game Boys with a Game Link Cable before turning them on, you and a friend can explore 80 new levels! You can choose Journey Onwards to use a saved character from the One-Player game, or Begin a New Game to play with a fresh character. Either way, it won't affect your saved game. You won't be able to bring any items from the one player game with you, except for Runes.
This game has the same number of dungeons as the main game, though they have different names, and another 83 levels of mazes. They are all easy to map, and have linear paths. Since it's a two-player game, you'll find two Runes at the bottom of each Cavern.
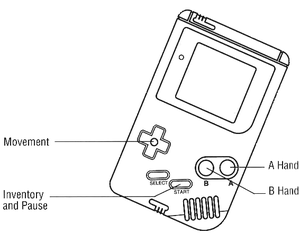
Overview of Controls[edit]
[Movement Keys] Moves party / scrolls through menu options.
[Start] Starts up the game / Inventory Screen / Pauses the game.
[A] Use whatever items you have in this hand / Changes weapons or items.
[B] Use whatever items you have in this hand / Changes weapons or items.
[Select] Drops Item.
Interaction[edit]
To pick up items, walk over them. To pick up items in shops, you must have enough gold to pay for them. You can talk to people, flip levers, open chest, etc. by bumping into them.
- To get through some levels you may have to use the same lever or pressure plate more than once.
- Many levers can be flipped back and forth. See what they do in each position.
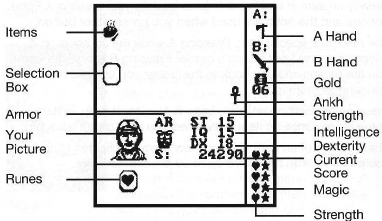
Inventory Screen[edit]
| Appearance | Name | Means | Notes |
|---|---|---|---|
| The Selection Box. | To select items or weapons. | To change weapons or items, move the box over an item and press A or B to put it in that hand. If you already have an item in that hand, the old item goes back into your inventory, and the new one goes in your hand. Food, potions, cheese and the ankh are used immediately when you press the button. To drop an item, press the Select button. | |
| Items. | |||
| A Hand | The A button use whatever items you have in your hands under the A. | ||
| B Hand | The A button use whatever items you have in your hands under the B. | ||
| Gold | The amounts of gold that you have. | – | |
| The Ankh. | The Ankh is a special item. It will teleport you back to Lord British's Castle, and restores ALL your hearts and stars. | NEVERTHELESS, you'll lose ALL your hammers, keys and boots! | |
| Armor | Shows, which armor you are using. | – | |
| Stands for Strength. (a) | Show many ( |
Strong characters can take a lot of damage. | |
| Yes. That's YOU | That is the champion that you have chosen to play with. | ||
| Stands for Intelligence. (a) | Shows how many ( |
Intelligent characters can use magic items more often before running out of energy. | |
| Stands for Dexterity. (a) | Shows how fast you can move. | Faster character can dodge monsters much better. | |
| Your current score | Certain actions will increase your points. | Finding a star, heart or coin (10), getting a Gem (50), entering a new area (1000), finding a Rune (10000). | |
| One heart of strength. | If an enemy hits you, you MAY lose ONE heart. | ||
| One star of Magic Energy | For the use of magic Items. | Some magic items and Weapons require magical energy (stars) |
(a) Each Rune that you can find increases your Strength, Dexterity or Intelligence.
 General Principles of Combat
 [edit]
In order to find the stolen Runes, you MUST fully explore the world of Britannia. You will soon discover that this is not without danger. Driven by hatred and hunger, monsters and, unfortunately, your fellow man will attack you without any warning. To defend yourself against these enemies, you have to use the [A] or [B] button. The tips below are essential for your survival:
- Hold down the [A] or [B] button to attack repeatedly with the same weapon.
- To get through some levels, you may have to use the same lever or pressure plate more than once.
- Tacks are useful against snakes and skeletons.
- Fight the monsters in narrow corridors, to prevent that they will attack you from all sides.
- In some places you can get the monsters to shoot each other so you do not have to fight them all yourself.
- Different weapons work on different monsters. Experiment!
- Non-flashing monsters (as you hit them) are invincible. Avoid them at all cost!
- Panpipes are useful to freeze the more difficult enemies.
- Keep collecting potions if you want to retain the use of the panpipes.
- Teleporting through an arrow onto a monster crushes it. They are acting as a wall for the monsters.
- Time your shots.
- Make use of your long range weapons (bows or crossbows) to weaken your enemies from a distance.
- While you are behind a secret wall, you can usually slaughter the monsters on the regular floor.
Your Friends and Foes[edit]
Allies[edit]
| Name | Portrait | Appearance | Class/Occupation/Race | STR | DEX | INT | Sex | Biography | Whereabouts |
|---|---|---|---|---|---|---|---|---|---|
| Ariana | F | Cavern of Injustice. | |||||||
| Beh Lem |  |
Gargoyle | M | A friendly gargoyle, Beh Lem is as comfortable amidst lava and volcanoes as you would be in a warm bath! He has a pet lizard named Bet Zen that likes to sit on his shoulder. | Isle of the Avatar, Cavern of Pride. | ||||
| Chuckles |  |
Royal Jester | M | All Chuckles does is juggle and tell jokes all day. He might be able to help you, but usually he’d rather just say something silly. | Castle Britannia. | ||||
| Dr. Cat |  |
Tavern keeper | M | Dr. Cat is the keeper of the Cat’s Lair Tavern, where he keeps fine paintings on the walls. He loves to talk to his customers, and his friend Taynith. | The Cat's Lair, Lycaeum. | ||||
| Finn |  |
Thief | M | Finn calls himself honest, but you’d better think twice before taking his advice! Some people say they’ve even heard him claim to be Lord British! | Cavern of Deceit. | ||||
| Gnu Gnu | Merchant | M | |||||||
| Johann | M | ||||||||
| Kador |  |
Talking dog | M | The talking dog of Zoltan, who gives you tips that will help you in your quest. | |||||
| Klip Klop | 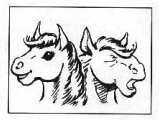 |
Klip-Klop is a strange two headed horse with a name for each head. Klip always tells the truth, and Klop always lies – or was it the other way around? | Cavern of Deceit. | ||||||
| Lord British |  |
Ruler of the kingdoms of Akalabeth, Sosaria and Britannia. | M | King of Britannia and a friend of yours for many years, Lord British once was a great adventurer himself. But these days he must govern the kingdom, and send others on quests in his stead. | Castle Britannia. | ||||
| Loubet | M | ||||||||
| Melissa | F | ||||||||
| Penumbra | F | Castle Britannia. | |||||||
| Sherry |  |
Talking mouse | F | Sherry is the only talking mouse in the entire kingdom. She lives in the castle, where Lord British reads her a story every night. She has been in many of the caverns and can give you some very helpful advice. | Castle Britannia, throughout the dungeons of Britannia | ||||
| Taynith | F | Lycaeum | |||||||
| Utomo | Merchant | M | A small hut on the Isle of Deeds. | ||||||
| Zoltan |  |
Fortune teller | M | Zoltan is a traveling gypsy, fortuneteller and a talented dancer. He also claims to be the king of the gypsies! But then, he also says his dog Kador can talk, and nobody has ever heard that happen. |
Monsters[edit]
Default sorting is by earned experience, that is proportional to how difficult a monster is.
| Name | Appearance | Exp | STR | DEX | INT | Powers | Strategy | Weakness |
|---|---|---|---|---|---|---|---|---|
| Eep Eeps | – | – | ||||||
| Bats | 10 | Agile and moves very quickly. | Only kill them when they block your passage. | Their bites do not cause much damage. | ||||
| Seahorse | 20 | |||||||
| Skeletons | 20 | |||||||
| Ghosts | 20 | Ghosts have the ability to pass through solid matter, where you cannot hit them. | ||||||
| 'Splodos | 20 | In impact, they will send shards of fire in eight directions. If they stay in a group, this results in a chain reaction. | The best and THE only way to survive their attack without being hit is to stay two East one South of a ‘Splodos and you’ll be safe. | Just stay four squares away. That is because their explosion radius is only three squares. | ||||
| Spiders | 30 | Creates cobwebs. | ||||||
| Jaggers | 30 | Even though most of them are invincible, some can be shot. If one of them touches you, it will leave you inoperative for a bit. Often change their paths after you pick up some treasure. After that, they can plow over that square. | Try to run behind them, but you can't move onto a square where a Jagger is partly touching. You can obliterate them by teleporting onto it, but if you shoot one down, it will appear at the last square where it landed on the grid. | They move slowly and cannot move through doors. | ||||
| Trolls | 30 | Really stoopied. | ||||||
| Squids | 30 | |||||||
| Seesills | 30 | Shoots fireballs. | ||||||
| Wizards | 30 | |||||||
| Rats | 40 | |||||||
| Gremlins | 40 | Steals your food and teleports away. | ||||||
| Cyclops | 0 | Watch out! Not only are they very strong, but hard to kill as well. Spells will not work either. | You should hit them when they are halfway from one square to another, and do this again. You will only need to do this twice. | While they're strong and hard to kill, the Cyclops is slow and vulnerable only to the magic sword. | ||||
| Reapers | 50 | |||||||
| Wisps | 70 | |||||||
| Dragons | 0 50 100 |
Shoots fireballs. | ||||||
| Snakes | 250 | Slow. | ||||||
| Tigers | 0 | They are REALLY fast and VERY powerful. | Fortunately, they are quite rare. Phew. | |||||
| Mimics | ||||||||
| Slimes |
[edit]
| Name | Portrait | Appearance | XP | STR | DEX | INT | Sex | Biography | Powers | Strategy | Weakness |
|---|---|---|---|---|---|---|---|---|---|---|---|
| Black Knight |  |
– | M | A fierce warrior who has always tried to overthrow Lord British's kingdom. Only one weapon can hurt him, if you can discover it... |
Choose of the Hero[edit]
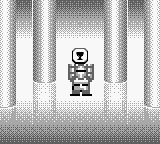
Your quest begins by picking one of the four champions, each with his or her own strengths and weaknesses.
| Portrait | Appearance | Name | Class | STR | DEX | INT | Sex | Biography | Advantages | Limits |
|---|---|---|---|---|---|---|---|---|---|---|
 |
Mariah | Mage | 15 | 15 | 18 | F | A member of the council of Mages, Mariah, is a student of ancient languages. After playing her magic trumpet, she can always create another by using the Ankh. | Mariah the mage is a well balanced character who excels in the use of magical items. Her strength and dexterity will rise quickly. | ... | |
 |
Iolo | Bard | 12 | 18 | 15 | M | A maker of bows and crossbows, Iolo is also an accomplished bard. Many a time has he entertained Lord British by singing and playing the lute. | Iolo the bard is a friend of Lord British, but his ace in the hole is a high Dexterity rating, making it easy for him to dodge during battle. | His strength is low. | |
 |
Dupre | Fighter | 18 | 12 | 12 | M | Brave Dupre has been on many quests. His sword is more powerful than any weapon the other champions begin with. | Dupre the Fighter begins the game as strong as an ox, He has the strongest weapon too. | His Intelligence and Dexterity are low. | |
 |
Shamino | Ranger | 15 | 15 | 15 | M | Shamino spends his time exploring the forests of Britannia. He always seem to return to the castle just when his help is needed most. | Shamino the ranger is the most balanced of the characters and a good choice for your first adventure. | ... |
The Main Quest[edit]
The culprit with the name of the Black Knight stole all the eight Runes of Virtue and hid them in their opposing dungeons. It's your duty to find them and bring them back to Lord British. Beware! Many dangers and adventures will awaits you.
The Rune of Honesty  [edit]
The Rune of Honesty in the Cavern of Deceit (located in the north of the Castle of Lord British) is the easiest of the eight Runes to collect. You'll find the Magic Wand here as well.
- Level One
There is nothing here, only a bat to kill. Just go east; south and finally take the stairs down to the next level.
- Level Two
You can do two things: Go north for the Rune of Honesty OR take the south path for the Wand of Fireballs. Let’s just go north for the time being. Run past some heads after you have reached the east edge. Then crawl into the hole to go further down. On this Level, you will find many pressure plates. Solution: U, E, D, E, U, East, etc. Just zigzag through the east corridor and then take the south one. As you are going north, get by the FIRST of the plates and then take the east wall. Go up and go to the next level.
- Level Three
You’re now in a room with another puzzle. Now it is a boulder puzzle. Solution: W, U, E, push east, push down, east, push down east, push up, Go East. After that, go up. As you flip the switch, you’ll notice that the troll (IF possible) turns 90 degrees. When he reaches the left edge, use the lever, and when he approaches the door to the left, do it once more. Up, left, down and right. Take the stairs.
- Level Four
On this level, you only have to exit the room south and go east, south, west, north, west, south, west, north, west, south, west, south, west and south. The corridor east leads you further on. Beware: Stay on the path.
- Level Five
Another puzzle. Only this time it is a maze. Solution: N, W, W, N, and east in the oddly shaped room, hit switch 1. S, W, S, S, use switch 2. W, W, turns switch number 3. N, N, N, and take hold of the Rune of Honesty!
Hooray, you have just recovered the first Rune! (You also get an extra star for your effort.)
- Listen to Kador
.
The Rune of Valor  [edit]
The second Rune is to be found in the Cavern of Cowardice (on the island far to the northeast), and inside it you’ll find the Magic Rope as well.
- Level One
Grab the cheese in a plant to the left. Now, go to the north, east, south, west, south branch, north, and go down the stairs.
- Level Two
Here, you will need to go to the east. At the edge, go to the south. Push the boulder west two squares to get some health. Go follow the corridor to the south and then to the west. Take the stairs. Do NOT take the mushrooms!!!
- Level Three
On this level, you will have two choices: the door south or a hallway to the east. There will be treasure to the south, but Gremlins steal some of them. East you go. Kill the rat, bat and the wizard (I advise you to hide east from him, go north, fire to the east and go back down until you finish him). Not to mention the Wisp who lingers here as well. Take the mushroom and descend the stairs.
- Level Four
There is a secret door in the east side. Push the boulders at the end of the passage to the right and go down. Pick up the food and stand at the right of the lever. Push it. Go south and climb through the hole.
- Level Five
Go west and let those monsters kill each other. Follow the passage to the north and talk to Dr. Cat. He passes you the ankh key. Go to the north and open the chest. Within you will find the star key. This will unlock the star door who is next to the ankh door. Use the switch and go east.
- Level Six
Go to the upper left and take the treasure. Stand on the plate, go to the bottom of the screen and go right. Use the Magic Rope, go to the edge, north, west and use the Magic Rope once more.
- Level Seven
Push the boulder to the right. Go south and get the star key. North, west and open the door. Run past the arrows and the pressure plate sets off. Use the food. Kill the skeletons and the ghosts each separately. Back west, north, unlock and open the heart door. Use the switch and a passage will open. Climb into the hole to the next level.
- Level Eight
Go to the north, east and south through an arrow. Take out the rats and go south through another arrow. There is a mushroom and treasure in a room in the north.
- Level Nine
Use the rope to get to the upper left island with the coins. Move right to the water’s edge and go down. Go to the south, kill the bats and pick up the mushroom. A new door will appear. Use the door and kill the troll. You will find a secret door in the northeast. Use it and push the boulder to the north. Climb the hole.
- Level Ten
Use the teleports. South, west, south, west, north, north, north through the secret wall, east through another one, east to the teleport and down the hole.
- Level Eleven
Run past the first three plates, but stay on each of the next three plates you touch. Ahead? A bunch of room with rats. After that? A reaper room. Go south past the doors, east and then south. Search for the Rune in the left upper nook. Beware: If you touch it, it pops over to the right. Remember: First fast, then slow!
Get the Rune of Valor. Hooray! You will get a heart as well.
- Take the stairs back out for an important item who is located at Level Six.
The Rune of Compassion  [edit]
In the Cavern of Hatred, located just a bit north of the Castle, you may acquire the Rune of Compassion and the Magic Axe.
- Level One
This level is rather empty, with only a single heart in the northeast. Oh, and go and kill the rat. You will find the exit to Level Two in the southeast.
- Level Two;
Kill the bat who wanders in the south. Take the door that does not look like it is leading anywhere, but you’ll find out that the wall is boundary. This will lead you to a new area. At this moment, you’ll have two options: hunting for some treasure or move on. IF you just want to move on, just follow the pathway and do not open any doors.
If you want to hunt for the treasure, go west and through a door. Kill the rat, and then go north and west. Talk to the mouse with the name of Sherry . She will tell you that there are two doors; one has a tiger and a lady behind the other one. Grab the heart key from the trunk as well. There are two heart key doors, right? The heart key can open only one. If you went to the west, you will notice an empty room below and the lady to the east of it. Go right and the Princess Melissa will be grateful and you can take one gem and two hearts. Use the exit. You will be to the left side of the area. Go left and get a coin. Go back right and move on.
There are some stairs, which will lead you to the Magic Axe, but about that later in Locations of Special Items. Getting a mushroom is difficult, but it will net ten gems and the experience to deal with several monsters in a wide-open area. The best way to survive their attacks is to go left and fire while using the side to pace up and down. Use the switch behind one of the creatures. The best thing you should do is to run and dodge the heads that will fire arrows at you. Take the left door to the next area. Here, there are a set of three heads to run past to get to a reaper. Kill it by shooting and dodging. Go left.
Yes, there are some heads again whom you will need to dodge once more. Kill the reapers. Take the stairs.
- Level Three
The first thing that you have to do is to go the room with the fountain and the bat, and pass through the door on the far side of the room. You will have a room with a boulder puzzle. If you mess up, just go back up the stairs, through the right door and back.
Solution: After flipping the lever. Push boulder east. N, E, S, W above Dr. Cat. N, E, push boulder into wall. N, W, S, push boulder S. W onto stairs, back down, push boulder east, push it south, and then east into the hole. Go back right of the lever. Push the boulder east, then south 3 squares, and then push it east. Push the top remaining boulder left to the wall and down. Push the right boulder down. Push the remaining boulder east, down, east past the ladder, and down into the final slot. Hooray!
Use the lever in the upper left. Take the teleport in the west to get the star key. Loot the chests, except the one by the teleport in the corner. The second top one reveals an arrow that will lead you to the next part of the level. Take down the stairs behind the star door.
- Level Four
After killing the rat (in the west), go north and east to the main room. Beware: Do NOT kill the troll, because he opens and closes the various gates. Just dodge him in the counterclockwise direction to the northeast gate. Remember that he will need to be two squares away. Finish the rat that is crawling in the NE. Time your shots to kill the skeleton. You will find the heart key behind him. Another rat is nearby. Use the teleport. Flip the switch and the SE gate will open. Retrace your steps to the center room and then go the southeast. Step on the arrow and descent.
- Level Five
Grab one mushroom (the first one) and step on the floor plates to dry up the stream. You will find the Rune ahead. Take it, and use the stairs.
The Rune of Justice  [edit]
This is in the Cavern of Injustice, located south of the Cavern of Selfishness. Tip: Bring lots of food.
- Level One
Here, you will need to move on before hell breaks loose, so quickly take the arrow south. Take the top door and then get the lower of the two chests to the left for some food. The top one is a mimic. Take the door that lies to the left of the ankh door to the north. Behind it lies an ankh key. Quickly take the exit. Head east and follow the south wall east. Go north at the turn and exit. Now you can do two things: go south and take hits from the lava OR the right arrow and the next one. After that, take the two left arrows back. Go this way: Right arrow, the down arrow and the right arrow. Go down. East and then go north and curve around the lava. Take the right door. Avoid the slimes and walk through the swamp to get access the stairs.
- Level Two
On this floor, you will need to go east, north and west. The room in the NW has treasure. If you step on the arrow, it will open the way out of there. Go past the arrow and take some hits from the lava. Just avoid the slimes and a mimic in the middle room. E, S, W and get a heart. Go south. Go west. Here you will have four exits. Even though you will lose some gold, you really should take the chest. Food!!. Go north. Kill the annoying rat and go west to push the boulder that way. At the top, use the Pipes again. Get the hearts and go east to climb down the stairs in the NE.
- Level Three
Take out the webs to the west and take the arrows left. Go right and shoot down the rats as they move towards you. Do the same thing with the slimes. There will be a chest of food hidden behind the gold coins. Pick up the heart and move along the mimic. Go to the south.
IF you came here for the second time, use the switch and destroy the barrel in the front of you. Push the next barrel down a square and enter the gate to the left. Step on the X.
Take the food and the heart key. Go to the left and unlock the door with it. Grab the hammer and smash the barrel that blocks the way. Push everything until you can go to the south.
As you can see there is the Rune of Justice in this room, but you’ll need some effort to get there. Go west and take the eight hearts. Go to the bottom of the south passage and through the secret doors to the east. Take the loot, go, and stand on the secret tiles. Take out the slimes without moving. Take out the top and go past the slimes. By touching the Eep Eeps, you now can go to the SW and reach out for the Rune of Justice!
The Rune of Honor  [edit]
You will find it in the cavern of Dishonor, which is one the island south or the one with the Castle. It's on the southwest side. While there, be sure to use your rope, grab a mushroom, and travel through the swamp to find the Star Key.
The Rune of Sacrifice  [edit]
You'll find it (Just like the Amulet of Lightning and the Magic Chalice) in the Cavern of Selfishness. It's on the island to the northeast; look north of the Cavern of Cowardice. Use the Magic Rope to get there.
Things to remember on the way down through this dungeon: bring cheese, burn spider webs, use Lightning on the Black Knight (get it nearby, then return), use a Trumpet to freeze Eep Eeps.
- Level One
In this Cavern, you will meet the Jaggers for the first time. Go south past two of them. In the bottom diagonal room is a heart key. Take it, and go back to the north. You will find a secret door in the square NW of the entrance. In the west of that room is a secret wall. Go south. The secret door leads east. Open the right heart door and run past the Jagger. When that is done just open the door. Push the boulder to the north and kill the bat, remove the webs with the Wand, push the boulder a square to the west and shoot the cobweb behind the west gate. Open the door in the north, push the boulder to the west, and climb down the stairs to the next level.
- Level Two
There are two secret doors in the north. Go to the east and south and take the secret door to the east. Go back to the west through the secret door, north, west through a secret door, south, west, north, west through a secret door, north, west through a secret door, north east and pull the lever to open the gate. Go west, south, east through a secret door, south, west through a secret door, push the boulder to the south, east through a secret door, east, south through a secret door and go east down the stairs.
- Level Three
Go east to the arrow, go to the west, north, east, north, west, and talk to the knight. Go east (only when the Jagger is not blocking you.) and run. Open the door with the cobwebs and take a star key. Use it on the door on the SE. Exit to the east. Use the Pipes (more about that later) and freeze the annoying Eep Eeps. Go to the west edge and take the mushroom to raise those gates. Just follow the east passage. Go south. Now, touch the Eep Eeps in the corner. This will reduce the lava to rubble. Afterwards, walk to the stairs in the center: south and then to the east. Walk down the stairs.
- Level Four
You’ll get in a room with four exits. Go to the north and fight those spiders. Pick up an extra hammer and kill the gremlin with a powerful weapon. Go to the right passageway to find it. In the north of this room, take two of the three mushrooms near the start. They toggle the gate. North, east, south is a lever that will allow you to jump through the door to the passage to the Rune. Go east, flip the switch and hit the arrow east. Hack through the spider webs and take the first turn down. This will lead you to a lever that will open the gate to the stairs down. Pull it, go back up, right and down through the cobwebs to the stairs in the center.
- Level Five
Move clockwise and go through the doors. In the SE, you find two Jaggers guarding a hammer. Take it. Go west to the statue room and then go north. There is a chest with another hammer. Go back and north. Some healing potions are here. Beware of the Mimic. Finish him and get the third hammer. Go back south and east and go up the passage to the south wall. Between the statue and boulder rooms. Just destroy the three barrels in the front and climb down.
- Level Six
You will have to follow one of the Eep Eeps to get into the passage beyond the small room where you start. Once you get to a left-arrow, you are free to go. He will probably block the path to some treasure east of the south passage. Do not worry, there is some treasure in the west as well. When you’ve got all of those treasures, go to the bottom of the passage and take the stairs to the east.
- Level Seven
Wear the Amulet (about that later) and go west through the doors. Kill the tiger. There are stars and hearts all over the place. At the top, go east. Fight the Mimic and take the star key. In the other rooms, you will find more treasure. (The one with the Reaper in the SW is the best of them all.) The stairs are west of the star door.
- Level Eight
(Yes. You're almost there) IF you don’t have the extra hammer then ready the wand and go to the north and east. Take the secret door left of the barrel. Use the Wand on the black webs and walk over the spikes to the mushroom. That will open the door in the SE. Pull the upper right corner lever. It flips star doors and cobwebs. Clear the cobweb on the right of the star key. Then clear the two above it. Take the star key. Go one to the east, two to the north and unlock the star door to the left. Go to the lower left and flip the switch. Smash the barrel next to the Rune so that you can reach it. Pick up the Rune and use the Ankh. Hooray!
The Rune of Humility  [edit]
The paths through this one and the Abyss are very linear. The Cavern of Pride is in the southeast corner of the southern island.
The Rune of Spirituality  [edit]
The Abyss is the only cavern where you have to fight Dragons.
Locations of Special Items[edit]
Plate Mail  [edit]
With this heavy armor you take only half of the damage from attacks.
Go to the Lyceum and get the gem in the basement, until you have 75 gold pieces or more. Have you noticed the black web on the isle off Verity Island? Yes? Good. When you are south of the troll you can get west of it, face east and use the bridge. Take the east dungeon and go to talk to Zoltan. He will sell you the plate mail.
Cavern of Deceit[edit]
Easy Money  [edit]
Follow the directions below to earn money quickly and safely. The extra bucks will come in handy.
- From the entrance to the cave Deceit, head to the right and pass through the door into a corridor full of mushrooms.
- Take one of the keys from Finn then go back down the corridor to the lower door. You’ll meet Finn again.
- After jumping down the hole. Step on the arrow and warp to the left. Then head up and to the right and take the five dollar token.
- To loop back to the cave’s entrance so you can repeat the steps above, head down to the arrow shown. From the room with the X you warp back.
Wand of Fireballs  [edit]
With the Wand of Fireballs you can burn the thick spider webs that block the ship that sails west.
- Level Two
Go back where I pointed out that you can go north OR south. This time go south. Go west on the arrow. North. The exit is to the west, but you can take the center gate above in the passage to the east. The arrow leads you to a trap which will kick you to the top. Beware: ALL other treasures are trapped, or will vanish as you touch them. In this place, push the barrel down all the way. Go west and push the left barrel up and the middle one to the right. Push the barrel above you two squares north. Walk around it. Take the lower of the two right passages. Run past the slime. Take the mushroom and then the hammer. Follow the passage. Push the barrel left and wait. Just sit back and kill those rats. Go east at the gates, face down and smash the barrel below. Descent.
- Level Three
Travel to the east, push the barrel east, north, east through the narrow corridor until below the sign. Wait. Some of the trolls will now kill each other. Go west. Just open the door and retreat. Kill the troll. There is a secret door on the right wall. Go east into it (two squares) and one south. In this way, you can kill those trolls without losing precious hit points. Take the stairs.
- Level Four
Another Maze. Just take the mushroom behind the ankh door. The star key is on the left side. As you enter, go north, west, south and then curl around the edge counterclockwise. Open the star door and take the heart key. The ankh key is to the east. Take it and go up. Open the ankh room and pick up the mushroom. Go to the gate in the east and climb down the hole.
- Level Five
This is a place where you will find many secret doors. Go east through the first one, south, west, south, west, north, west and north through the secret wall to the pressure plate. Go back south through the two secret doors to get the Wand of Fireballs! Hooray!
- Take Sherry's advice and use the ankh.
Cavern of Cowardice[edit]
Magic Rope  [edit]
The Magic Rope can be used to cross-rivers and narrow channels of the sea or streams in caves.
- Level Six
Kill the bats first. Push the bottom boulder to the north only once. Push left boulder down. Grab the mushroom and a new room will open. Get inside.
Run to the left and get the two hearts to the north. Walk to the south and along the water. Go to east, south and to the west. Pick up the mushroom and the rope of course.
Cavern of Hatred[edit]
Magic Axe  [edit]
The Magic Axe is a potent weapon, but it causes less damage than the Sword. It returns magically back into the hand of the thrower.
- Level Two
Climb down the stairs, (in the same area of the mushroom and the switch behind the reaper.) and go to the west and south to find the stairs.
- Level Three
On this floor you’ll find another puzzle. This time you have to deal with tigers.
Solution: Push the SW boulder down all the way. Push the boulder east of where it is was to the west. Go back to the east, until you hit a boulder. Push this boulder to the north. Push the other east. Go back and push the boulder to the west one square over. Push the next boulder until it is wedged between the two tigers’ cages. Step on the pressure plate and walk to the north. (East you can find some food.) Go west and follow the path.
Now on this level, you have to take the west passage from the area with Klip/Klop (Pushmi-pullye) (Solution: Believe Klip) and go down. The Magic Axe is in a chest at the end of the hallway. Now you can take the other way by going east, take arrows east to find the stairs to the surface.
Cavern of Injustice[edit]
Boomerang  [edit]
Pan Pipes  [edit]
The Pan Pipes freeze monsters in their tracks for a short while.
- Level Two
Do you remember about those four exits? No? Go and look it up. Yes? Go south. Listen very carefully to Ariana. Follow this pattern: 3x south, 3x west, 3x south, and 7x east, near the lava. 3x south, 3x west, north, 3x west, 3x south, east, south, 5x east, south two squares, east by walking over the lava and through the door. Take the pipes. Retreat the same way to get out of there.
Cavern of Dishonor[edit]
Magic Whip  [edit]
Cavern of Selfishness[edit]
Amulet of Lightning  [edit]
Shoots lightning bolts. It is THE only weapon effective against the Black Knight.
- Level Three
Go east to the arrow, go to the west, north, east, north, west, and talk to the knight. Go east (only when the Jagger is not blocking you.) and run. Open the door with the cobwebs and take a star key. Use it on the door on the SE. Exit to the east. Use the Pipes (more about that later) and freeze the annoying Eep Eeps. Go to the west edge and take the mushroom to raise those gates. Just follow the east passage.
Ready the Whip. Wait for the Jagger to go south before taking out the cobwebs to the south. Follow the Jagger and pick up the mushroom and/or the heart. The mushroom will release a square east of the entry. Go up it and start whipping the spiders. There is a teleport in the NW. Use it and follow the Jagger, while whipping the cobwebs. Exit east. Take the magic and/or the potions. Freeze the spiders and kill them. There is a star key in the far NE. Go back to the west and south.
Go south and kill the spiders. There is a fountain in the center of the level. The south passage to the west will lead to an Eep Eeps. Touch it and it will clear the boulders in the SW. The chest SW of the reaper has the heart key. Go east.
You are now in a room that is divided into a NE and SW area. The main features of this strange room are those portals near the center. Which you must use to flip between the NE and SW. In the SW, get the mushroom in the SE corner. Finally, go to the NE behind the gate and switch the lever. Stock up all the treasure and go to the SE to get the Amulet. Use the ankh to get out.
Magic Chalice  [edit]
This item recovers the lost hearts, but it will cost magic points.
- Level Four
Go back to the room with four exits and go south. There’s a lever under a chest, in the back of the SW door in the starting hallway. Follow the Jagger and take out the cobwebs. Go south down the corridor. There are two stairs here. Take the right one.
- Level Five
On this side of Level Five, (from the ladder) there is a secret door north in the NW corner of the starting area. Take it. Go N, E, S, E, N, W, S (Taking a detour to get a heart), W, S, W, N, and E. In the north is a heart, but you also can ignore that and can go the east. In this room, you’ll have to take the arrow to the right and pick up the star key. Then take the arrow left.
The star key allows you to get past the river. Use the door on the left. Freeze the spiders and kill them to get many hearts. Shoot the cobwebs under the mages and run. Flip the switch to the right and run by under the mages. Wait for the Reapers’ shots hitting the middle one and run back. Just let the Reaper kill them all. Take the right arrow again, run past the Reapers, and get the heart key on the right. Run back left and use the amulet to destroy the middle reaper. There is a heart behind him. Take another heart and push the boulders under the reapers to the outside. They all will now shoot each other.
Clear the others to the side first. Then push it up and then to the right. Kill the mages first. Then the Reapers (only if you want it to) or use the rope to the south and go east to pick up the Chalice. You can go to the west, use the bridge to the north, and exit through the heart door. You can retreat to Level Four or use the ankh.
Cavern of Pride[edit]
Troll Ring  [edit]
Disguises you for awhile so most monsters won't attack.
Magic Sword  [edit]
Enchanted by Penumbra, the mighty blade was lost long ago.
Great Stygian Abyss[edit]
Magic Armor  [edit]
Crafted from dragon-hide, this suit of armor has been stolen by the Black Knight. THE finest armor available.
See Also[edit]
| Walkthroughs | |
|---|---|
| Game | Ultima I ☥ Ultima II ☥ Ultima III ☥ Ultima IV ☥ Ultima V ☥ Ultima VI Savage Empire ☥ Martian Dreams ☥ Ultima Underworld ☥ Ultima VII ☥ Ultima Underworld II Ultima VII Part Two ☥ Ultima VIII ☥ Ultima IX |
| Console | Ultima III (NES) ☥ Runes of Virtue ☥ Ultima VII (SNES) |
| Fan Games | Ultima IV Part 2 ☥ Ultima V: Lazarus ☥ The Ultima 6 Project ☥ Ultima: The Dark Core |
